 By
By 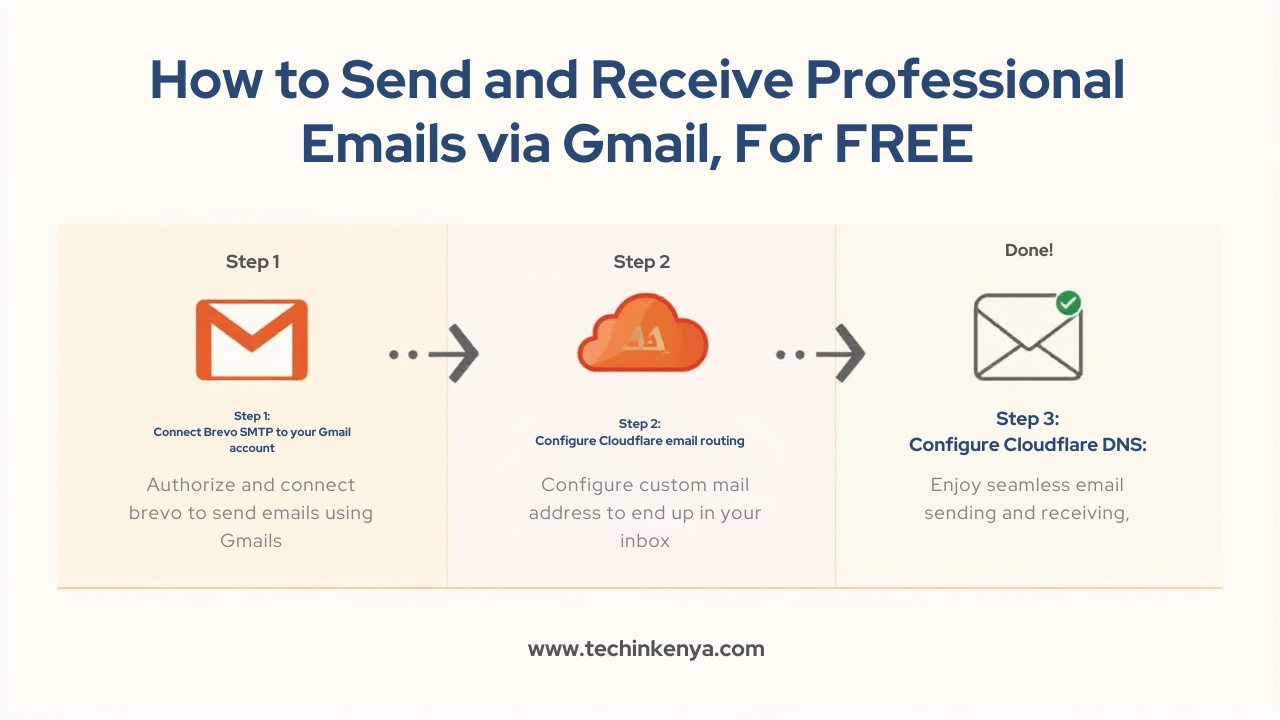
Are you tired of using a @gmail.com address for your business? While Google Workspace costs about $6/month, you can actually get a professional @yourdomain.com email address for free by leveraging Cloudflare and Brevo.
In this guide, I will show you exactly how I set this up for calebms.com using my laptop.
Prerequisites
A Cloudflare account (Domain DNS must be managed here).
A Brevo (formerly Sendinblue) free account.
A standard Gmail account.
Registered Custom Domain
Tutorial Update: SMTP Flexibility
Note on Providers: While I used Brevo for this guide because of its generous free tier, this method works with almost any SMTP provider. If you prefer Mailgun, Amazon SES, or Postmark, the process is identical—simply swap the Brevo SMTP server, port, and credentials with the ones provided by your chosen service in Step
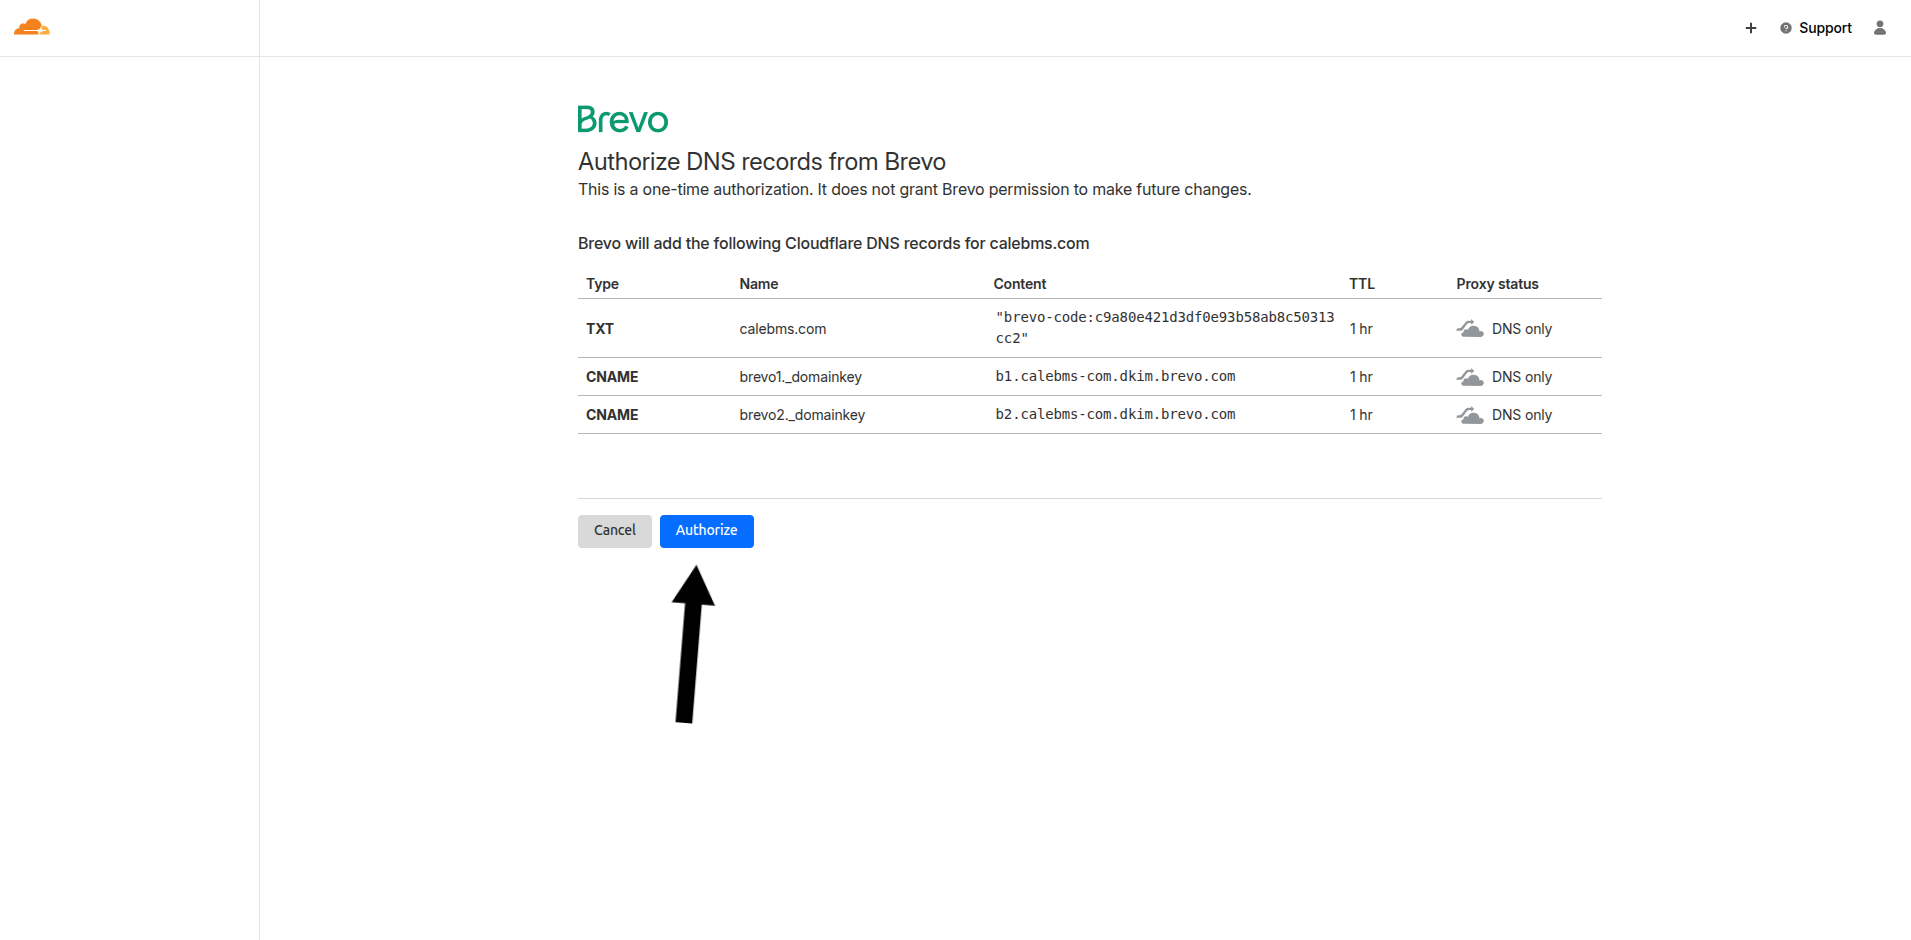
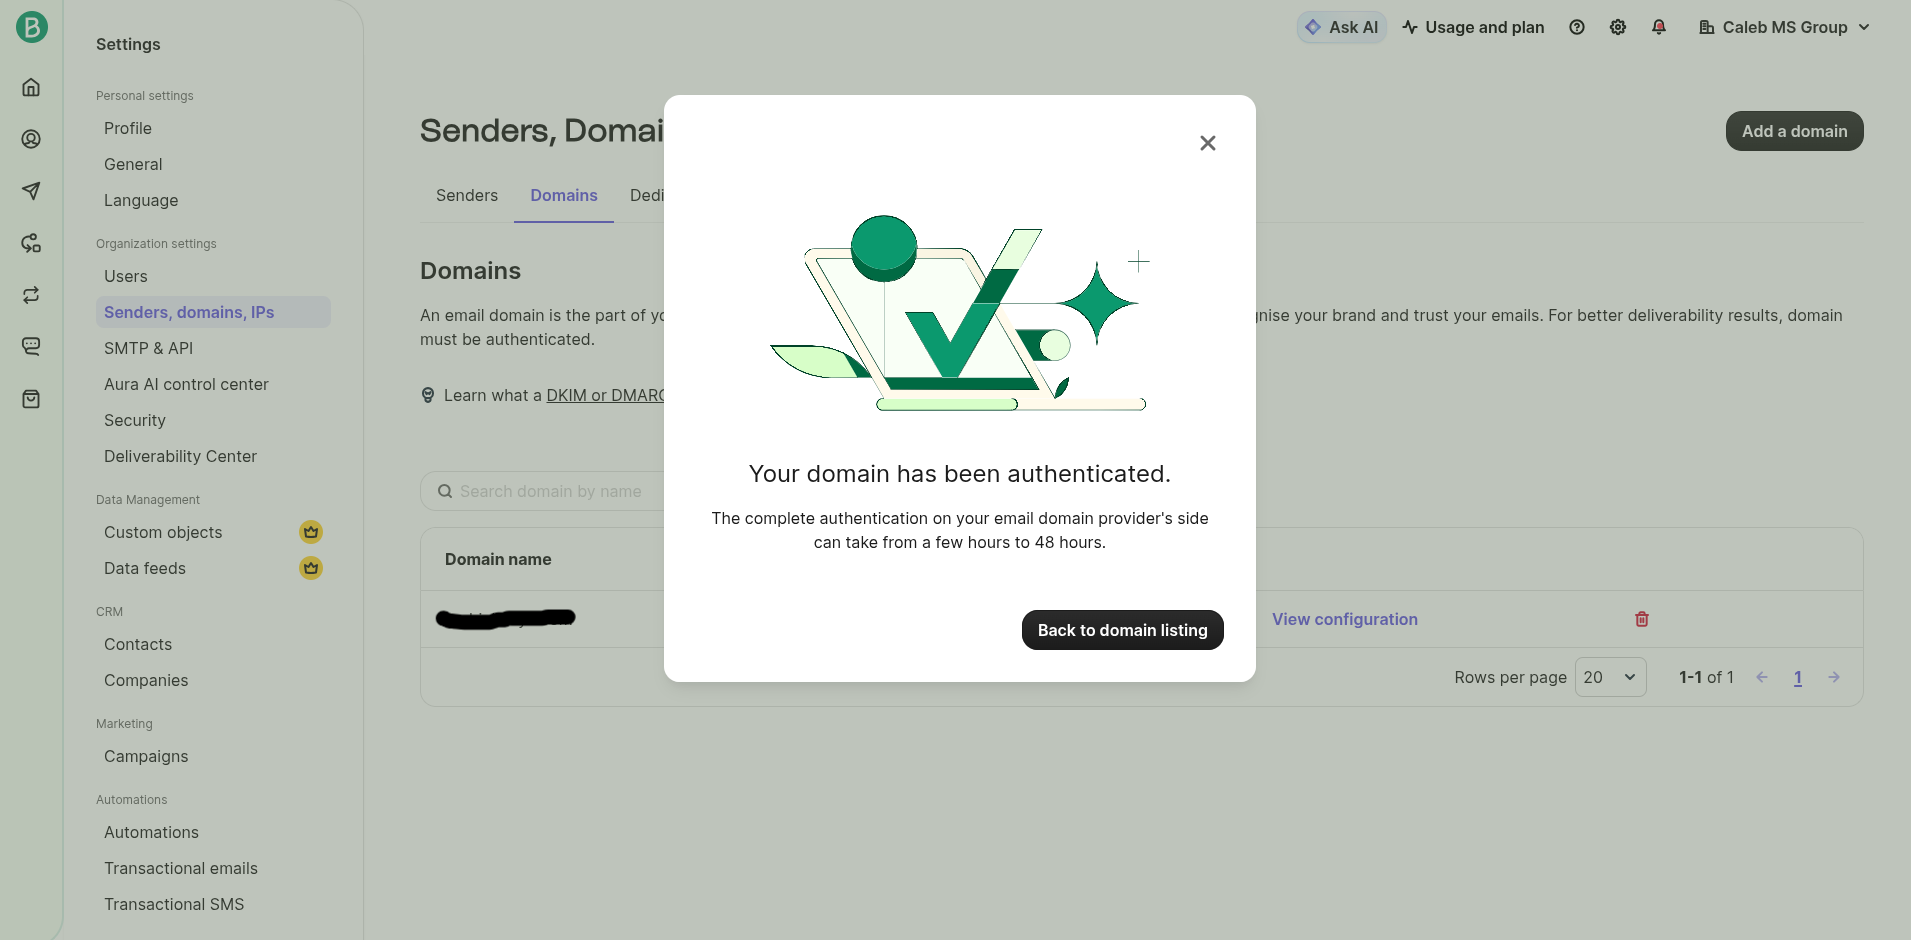
Step 1: Authenticate Your Domain in Brevo
First, we need to give Brevo permission to send emails on our behalf.
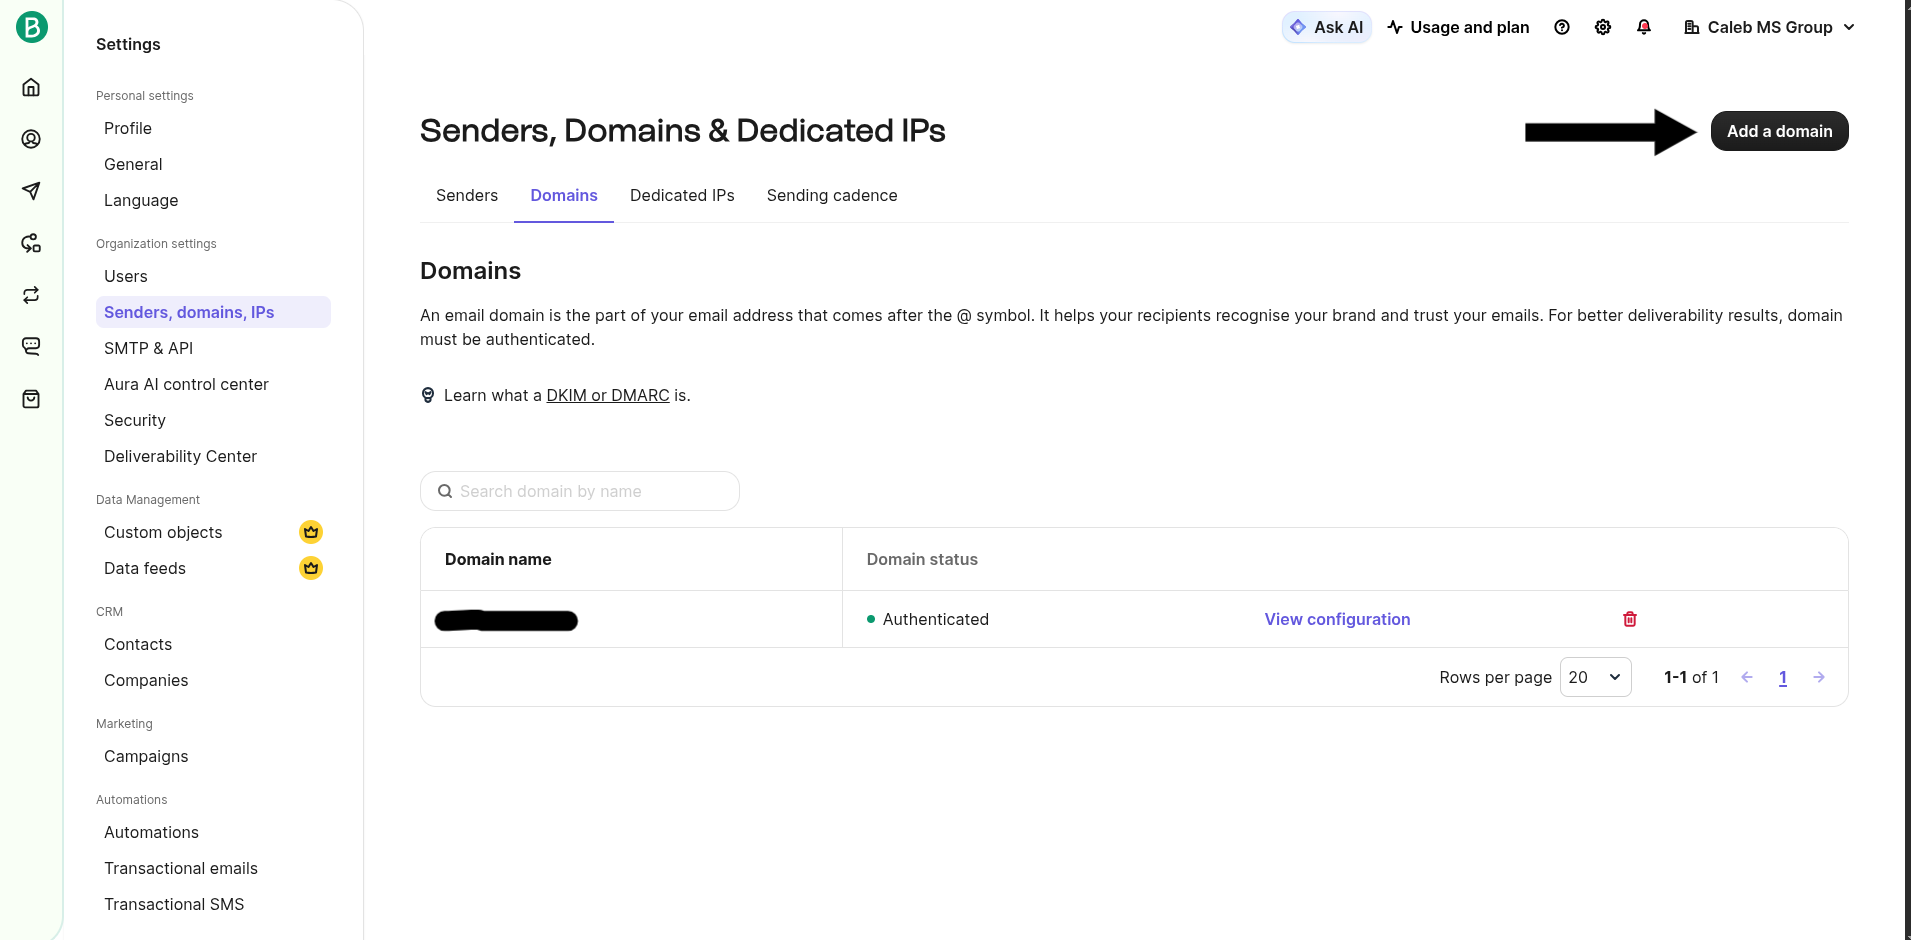
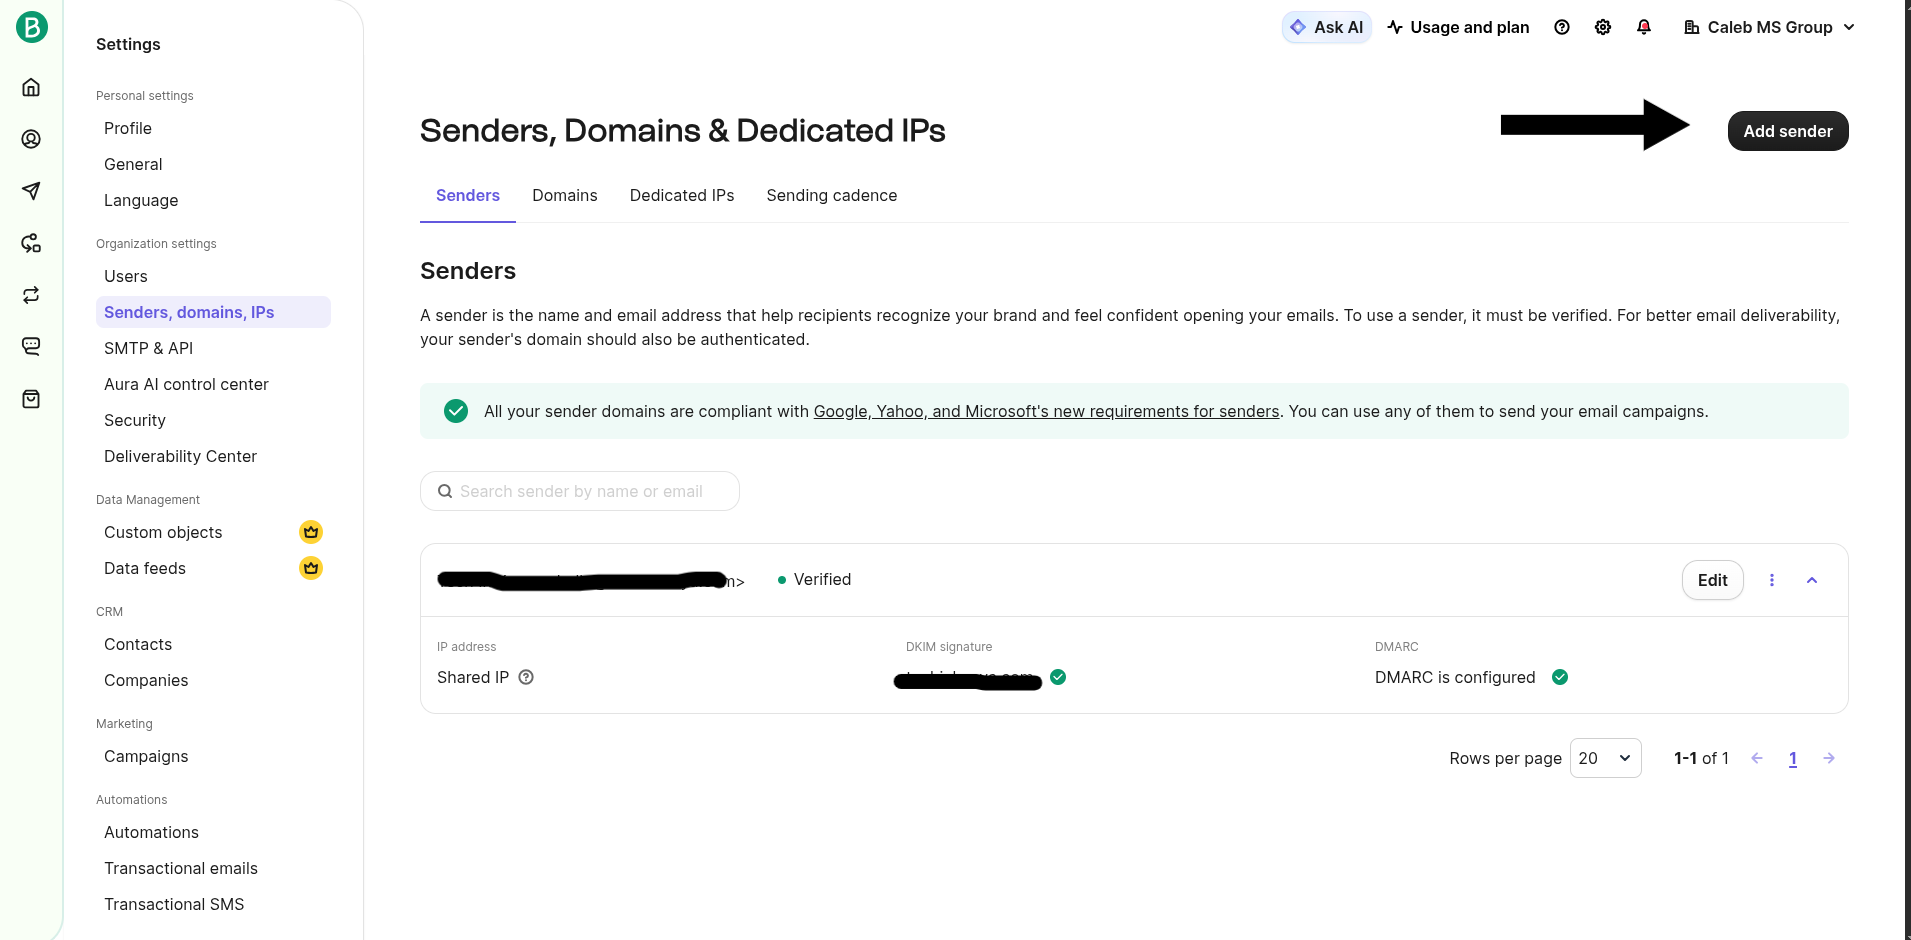
Log into Brevo. Go to Settings > Senders, Domains, and IPs > Domains.
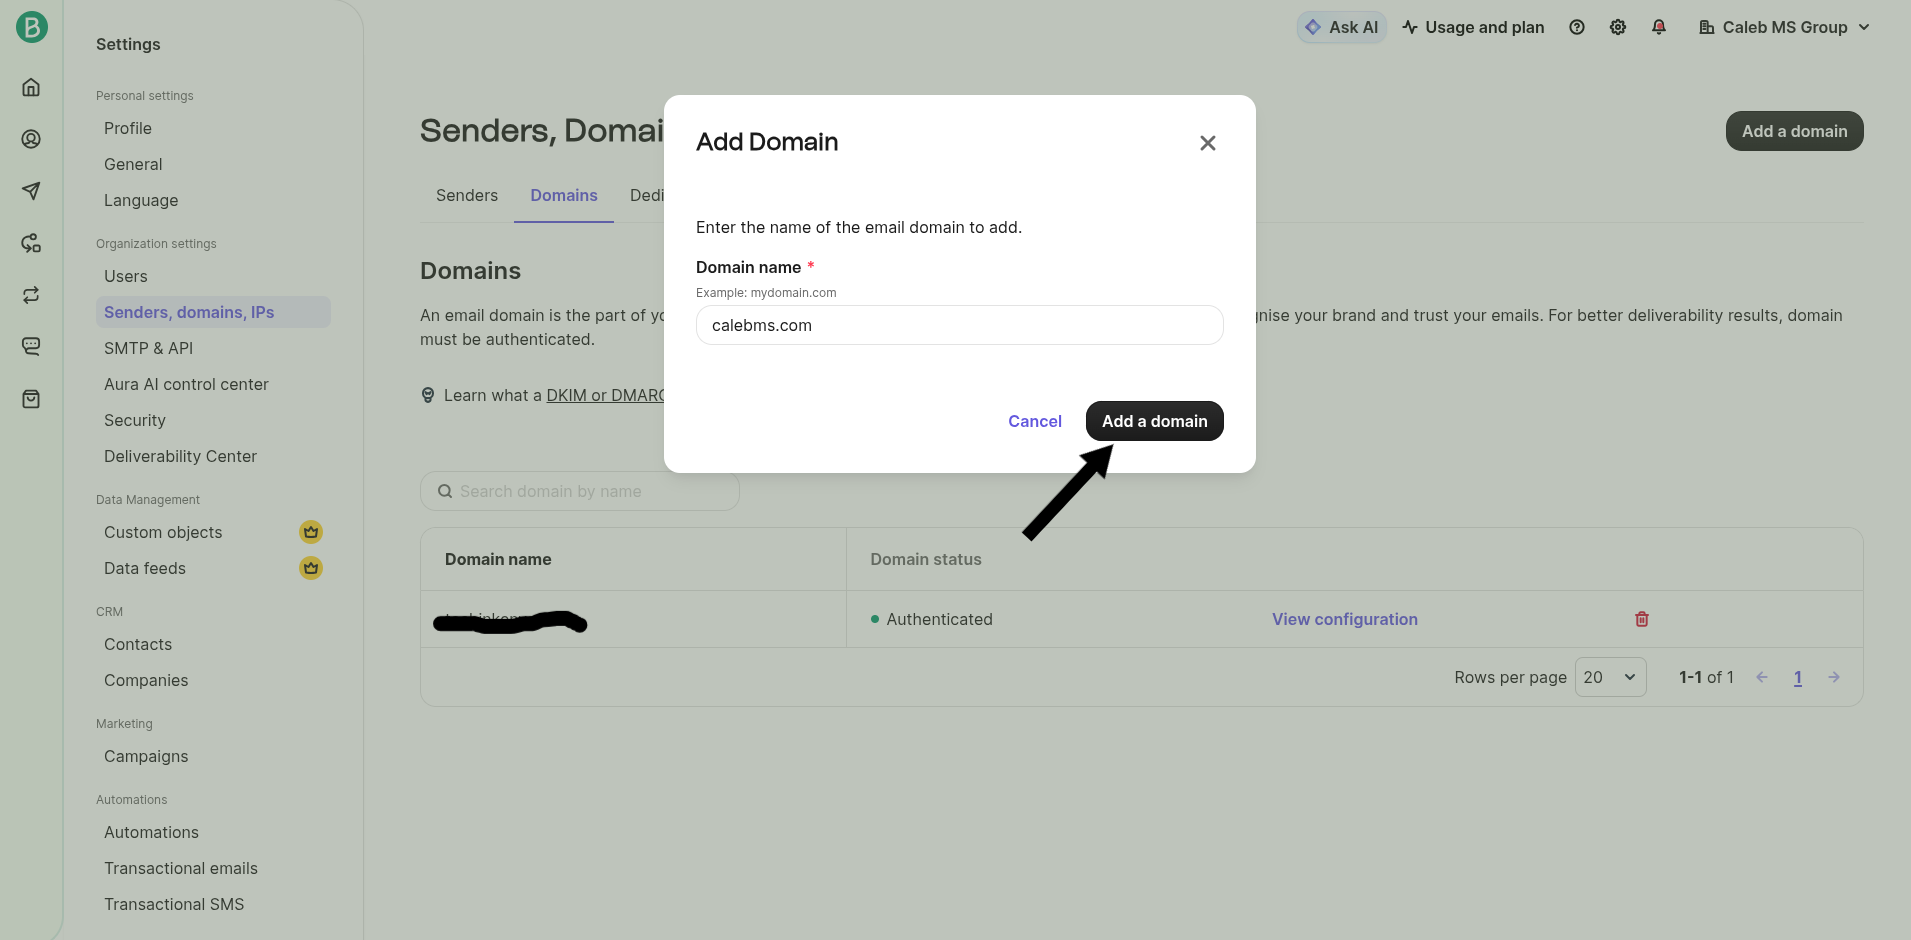
Click Add a Domain and enter your domain (e.g.,
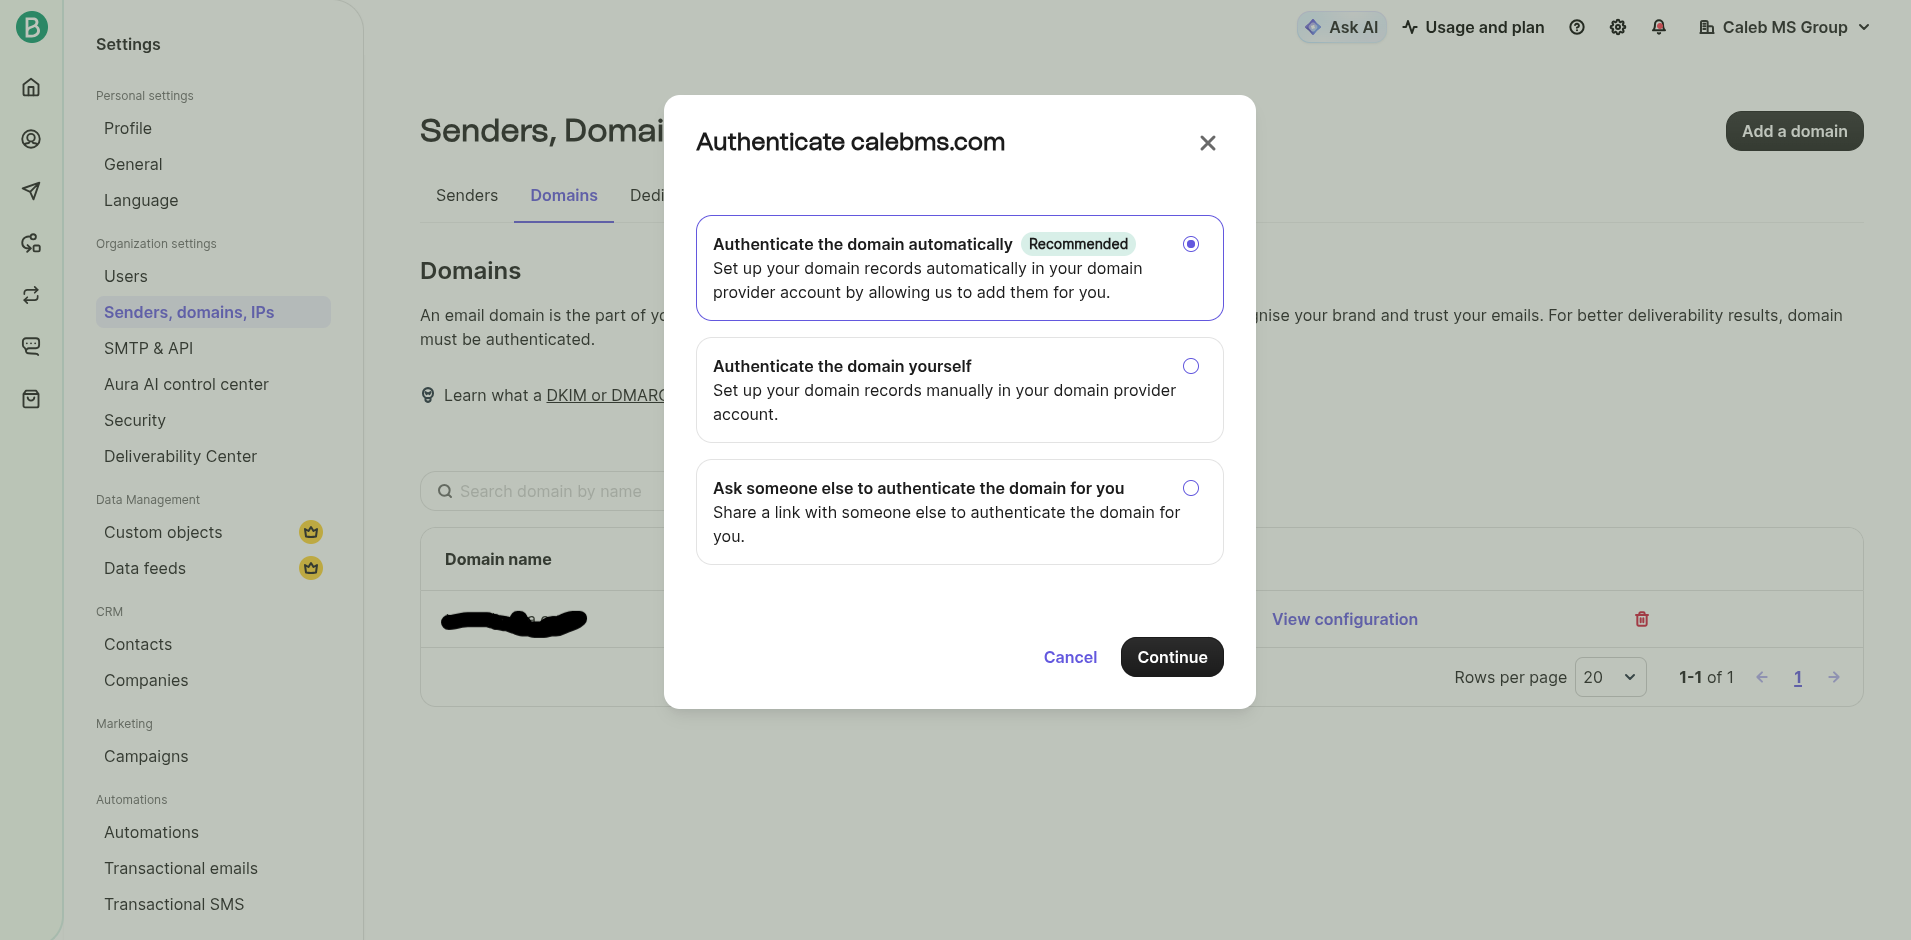
calebms.com).Select "Authenticate Domain Automatically." You will be prompted to log into Cloudflare. Simply authorize the request, and Brevo will automatically add the necessary DNS records.
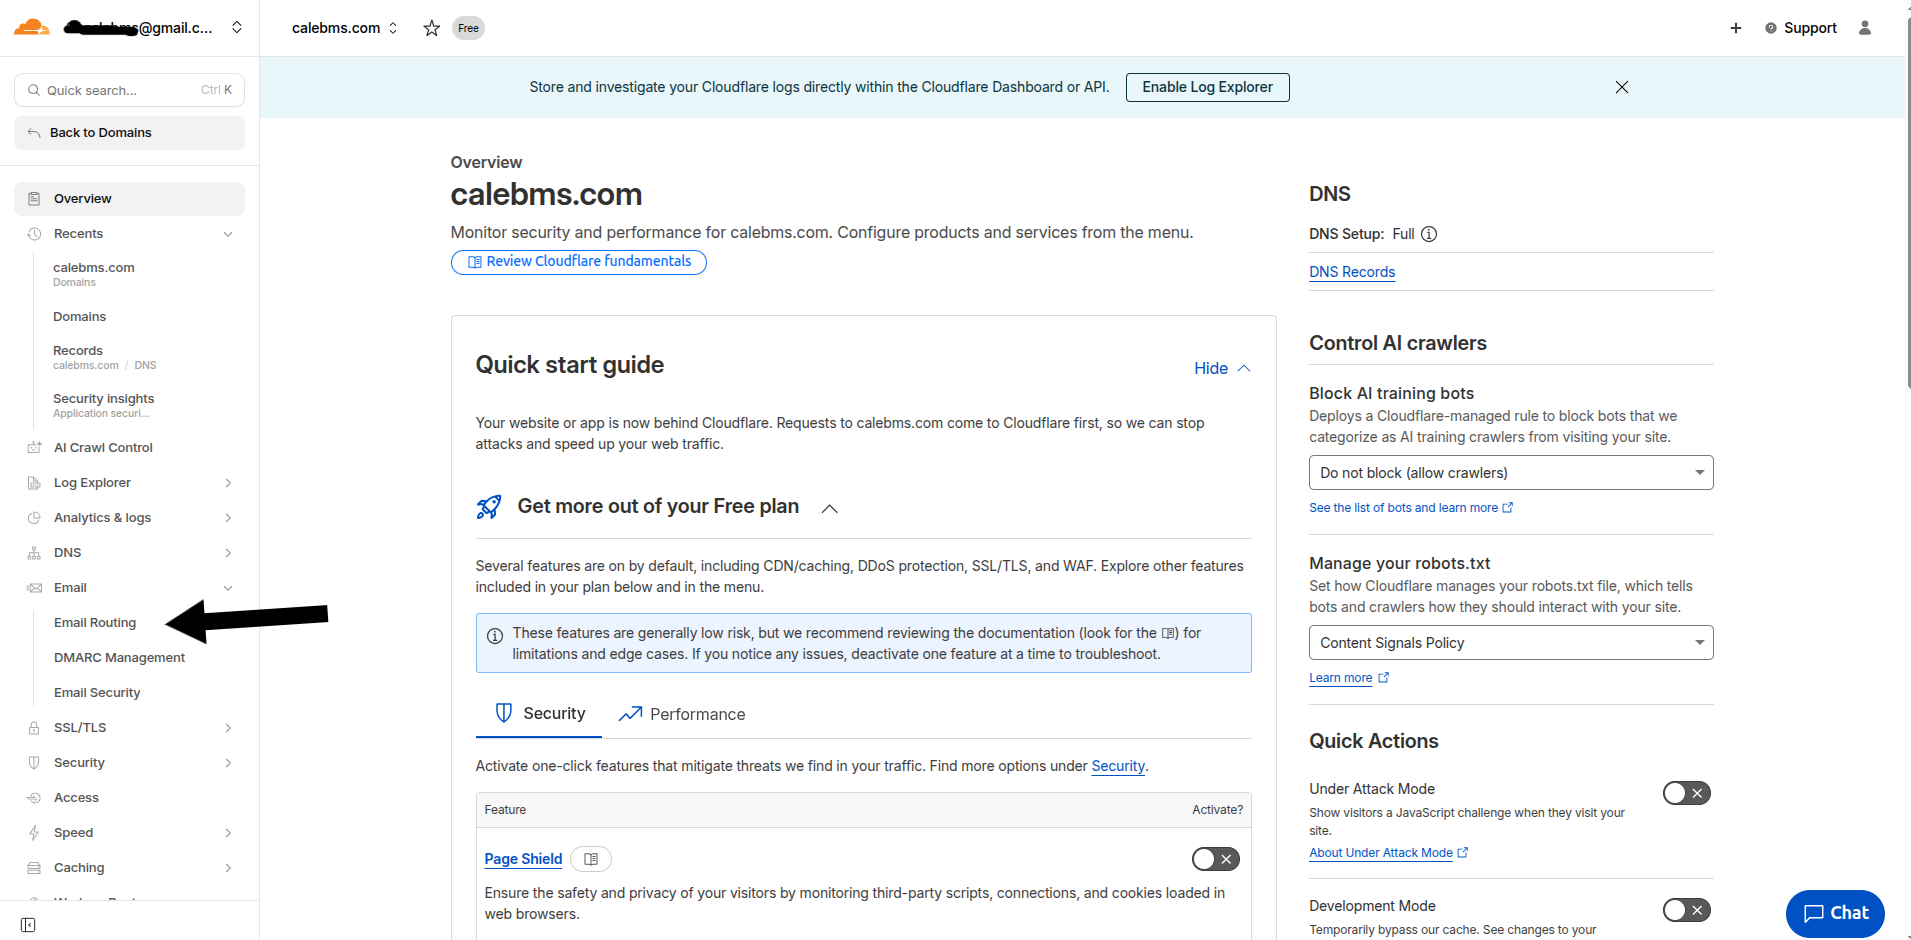
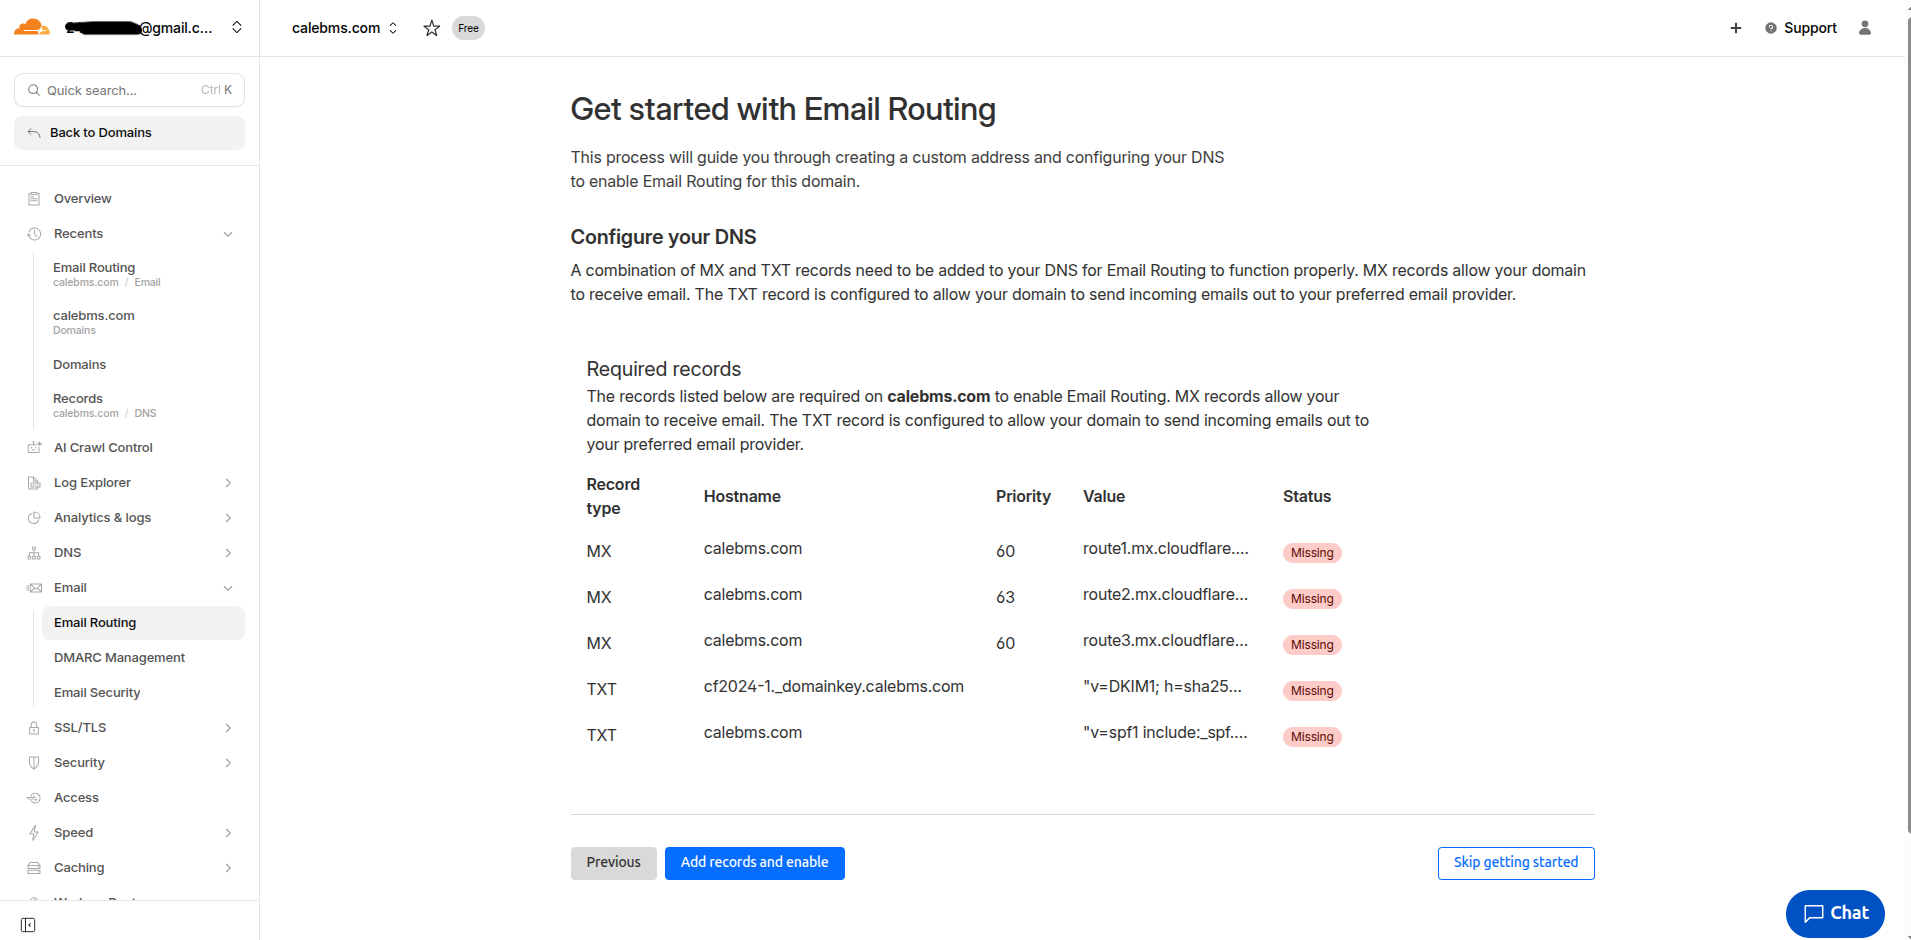
Step 2: Set Up Email Receiving (Cloudflare Email Routing)
While Brevo processes your domain, let’s configure how you will receive mail.
In Cloudflare, select your domain and click Email > Email Routing.
Cloudflare will show you the required MX records. Click Add records and enable.
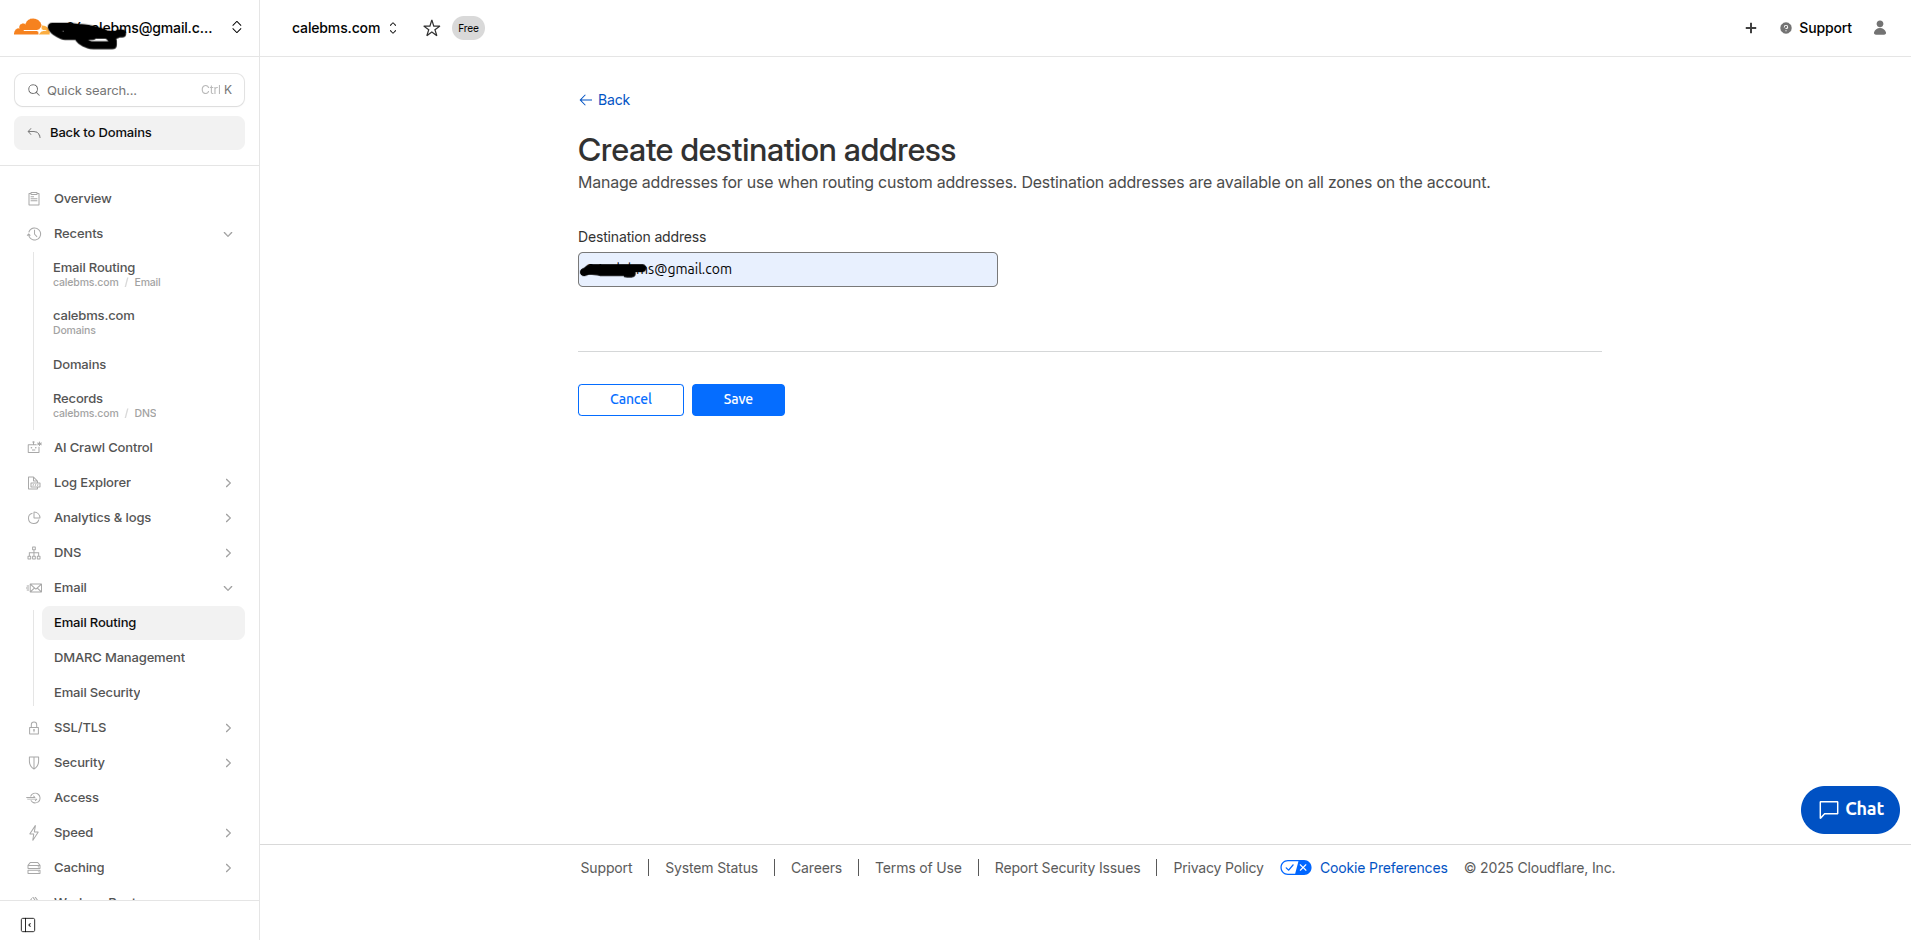
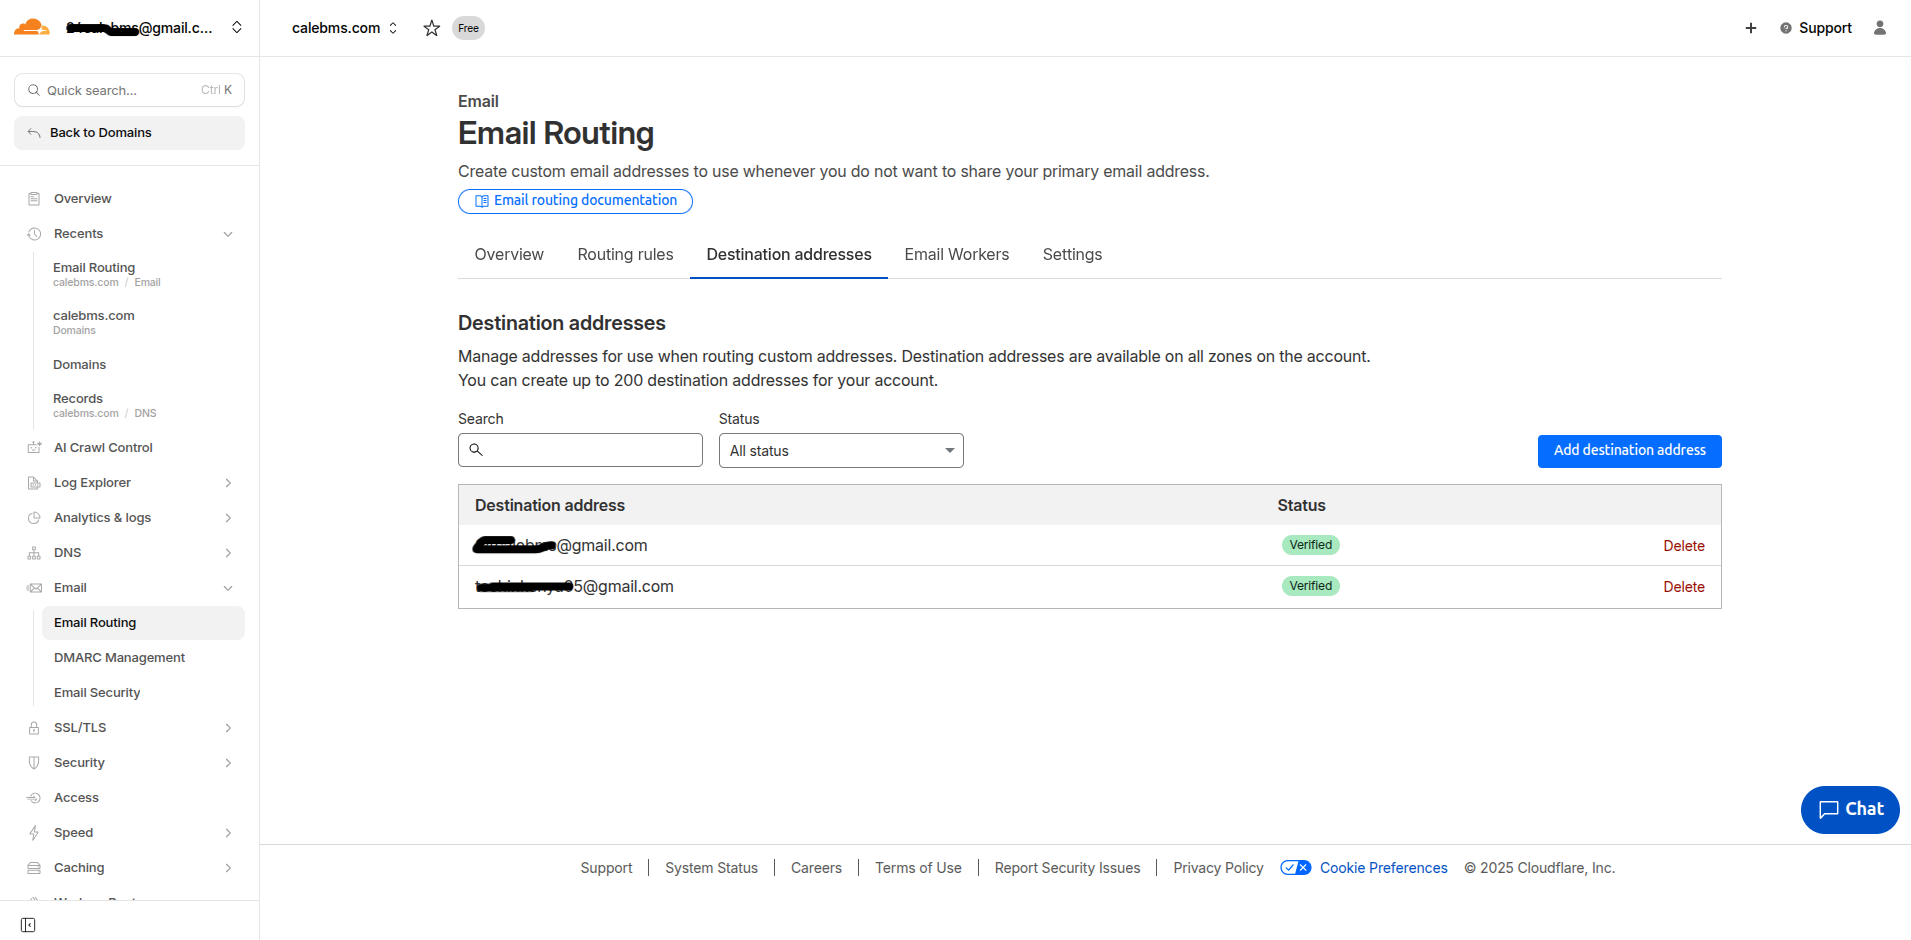
3. Go to the Destination addresses tab. Add your Gmail address and verify it via the link sent to your inbox.
4. Go to Routing Rules and click Create custom address.
Custom address:
[email protected]Action: Send to email
Destination: Your verified Gmail address.

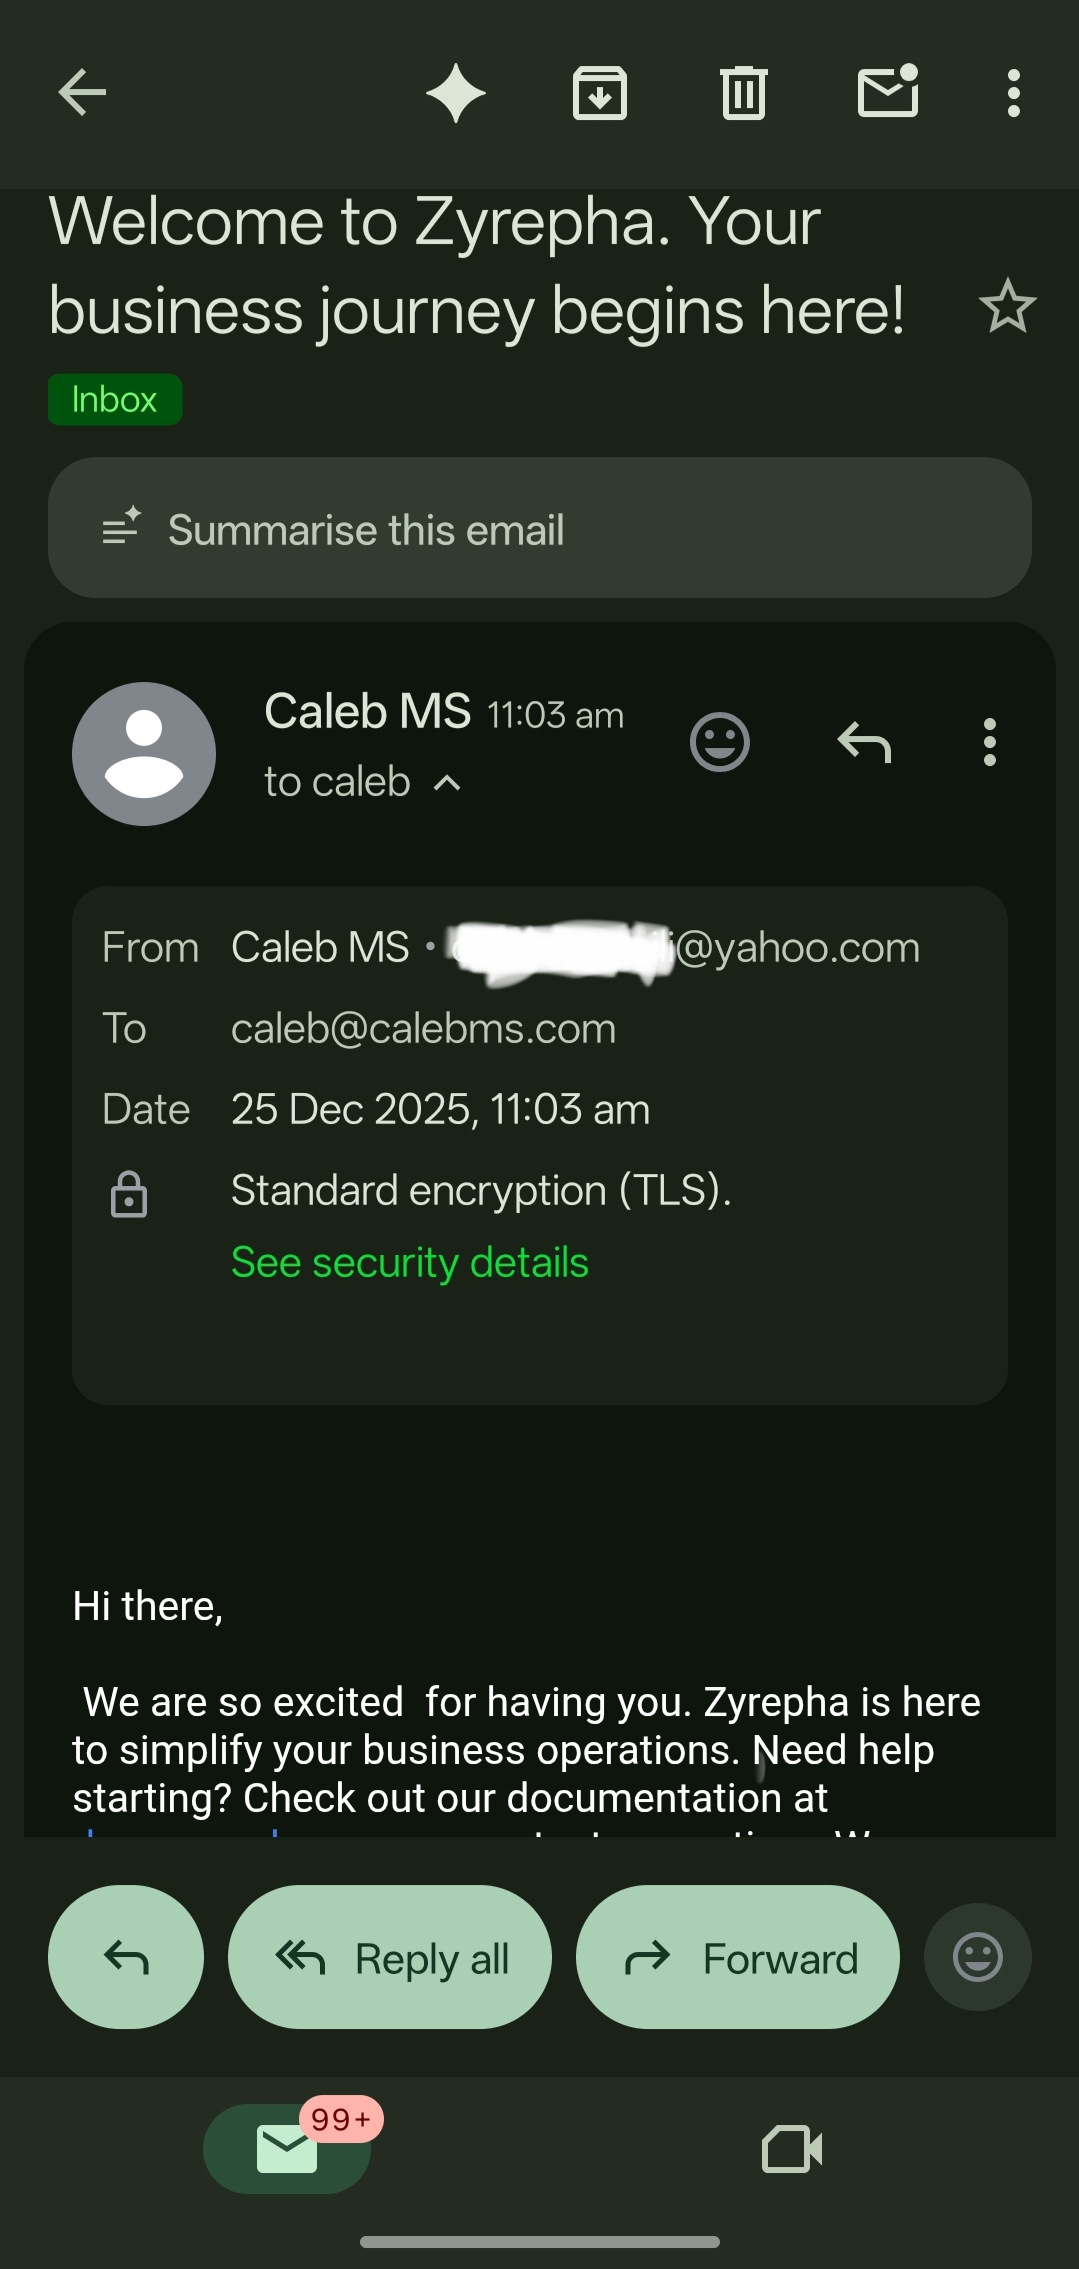
Pro Tip: Send a test email from a different account (like Yahoo) to your new custom address. It should arrive in your Gmail inbox instantly!
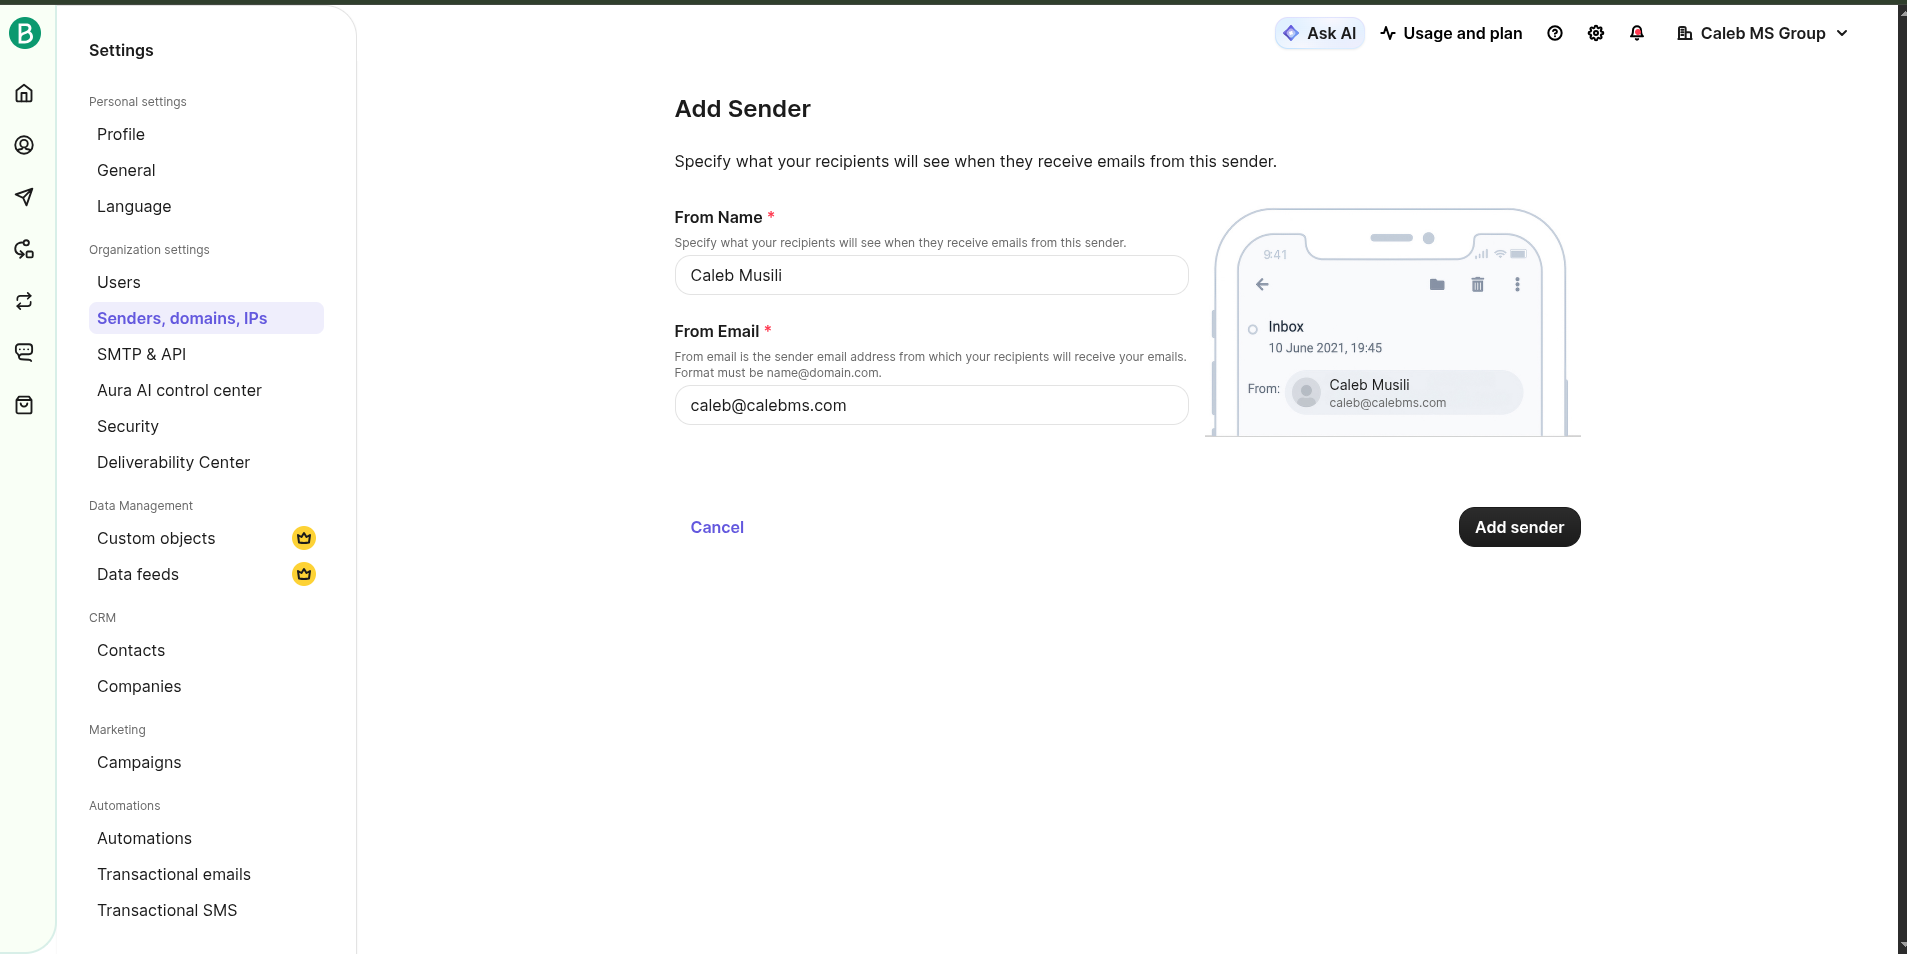
Step 3: Configure "Send Mail As" (The SMTP Setup)
Now, let’s make it possible to reply using your professional address.
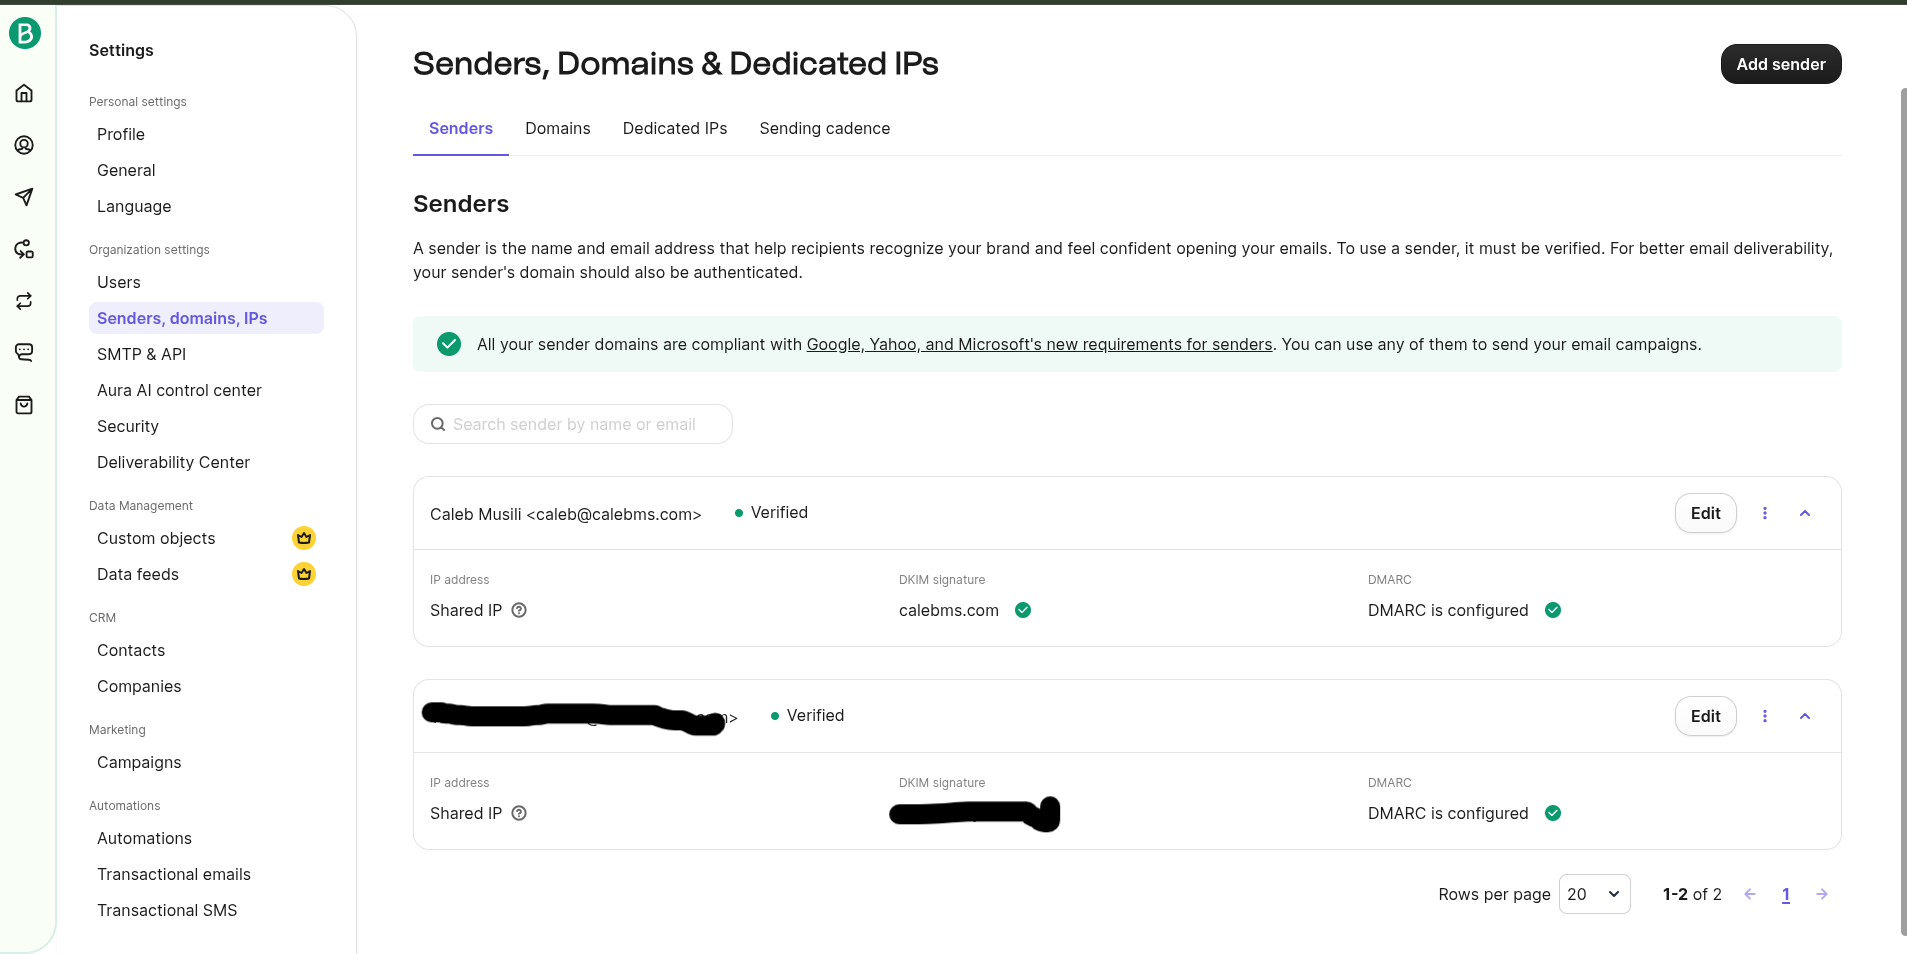
In Brevo, go to Senders > Add a Sender. Use your name and your new professional email (e.g.,
[email protected]).
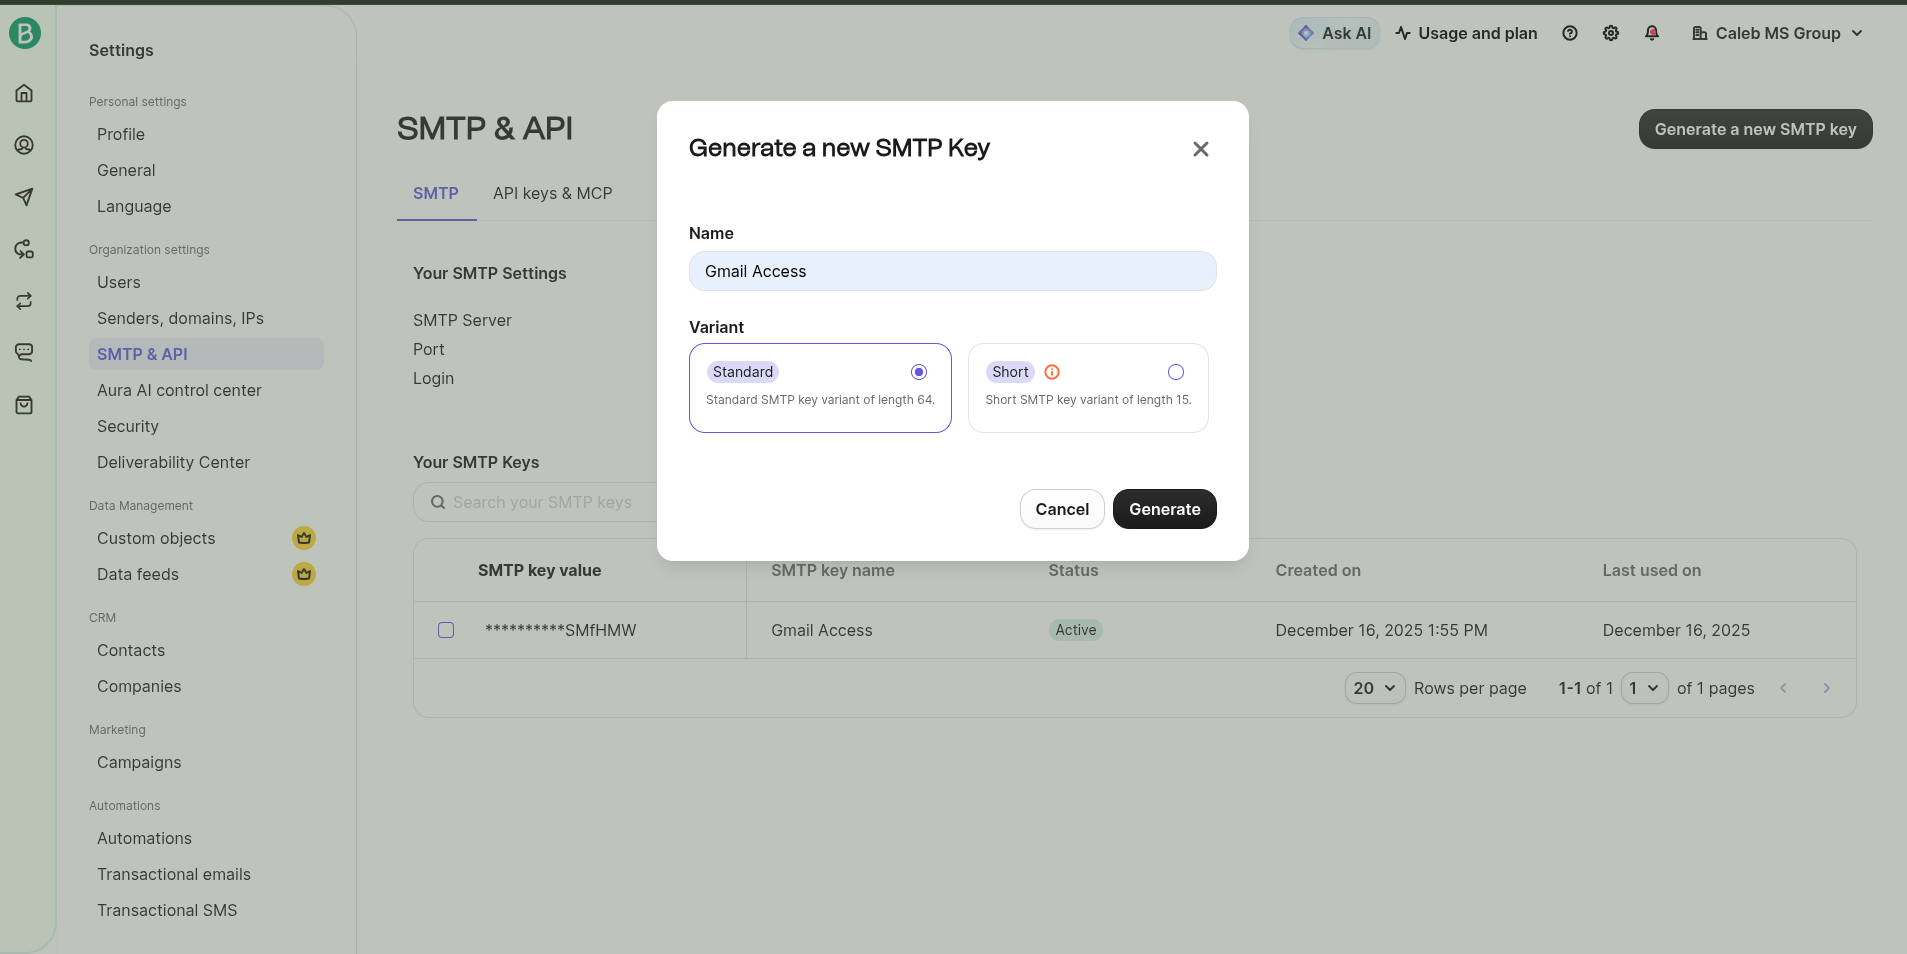
2.Navigate to SMTP & API in Brevo. Click Generate a new SMTP key.
Name: "Access Gmail"
Important: Copy this key immediately and save it safely. You won't see it again!
Note your SMTP Server , Port (587), and Login (your Brevo email).

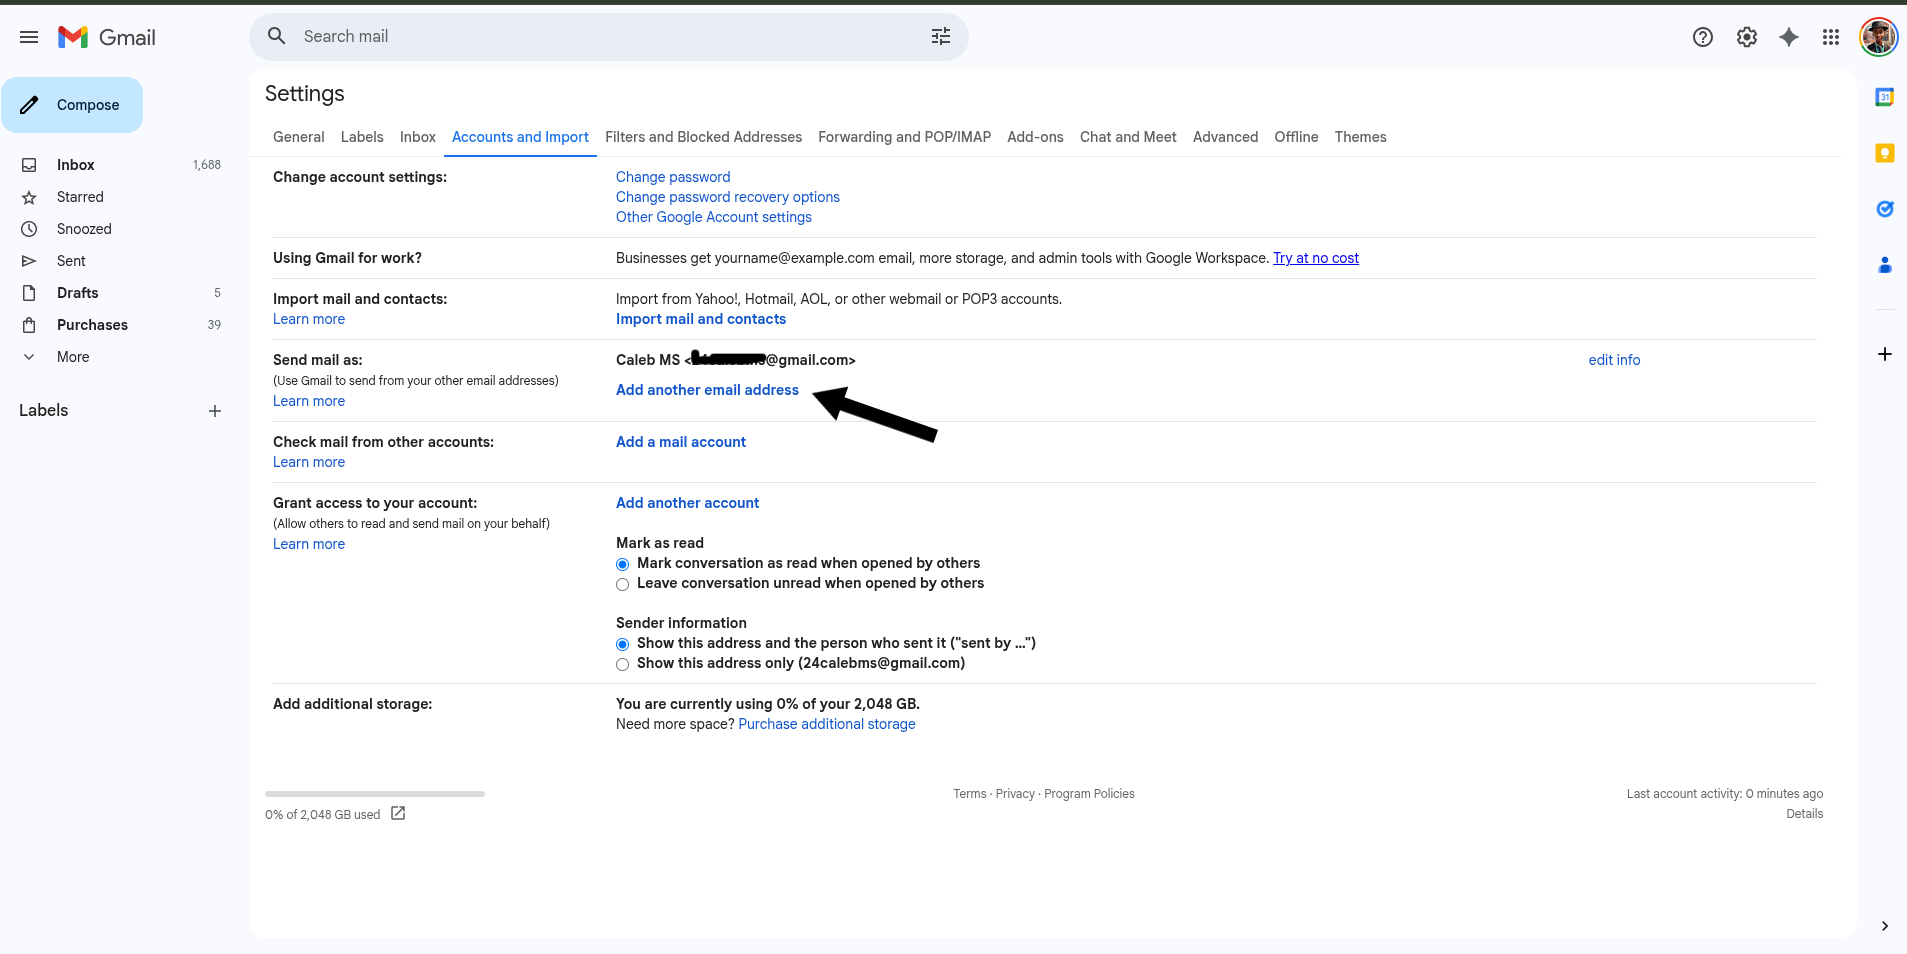
Step 4: Final Integration with Gmail
Open Gmail in your web browser. Go to Settings > See all settings > Accounts and Import.
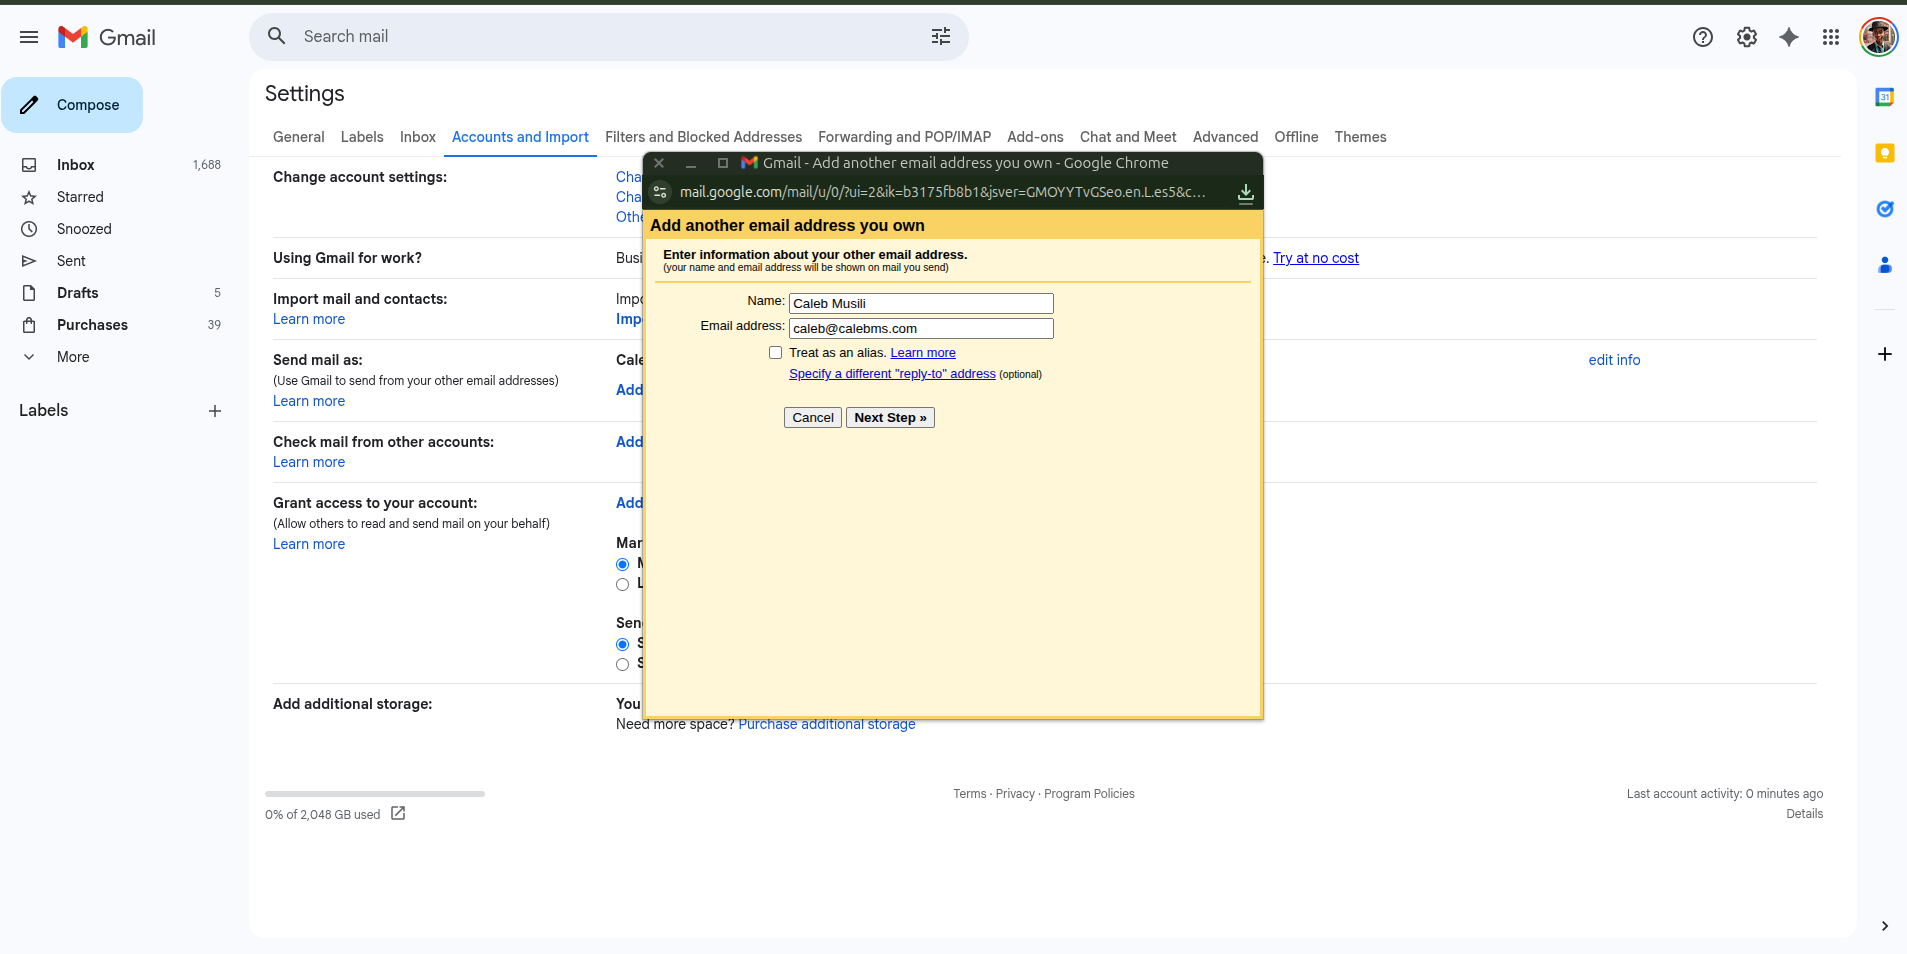
Under Send mail as, click Add another email address.
Name: Your Name | Email:
[email protected].CRITICAL: Uncheck "Treat as an alias" and click Next.
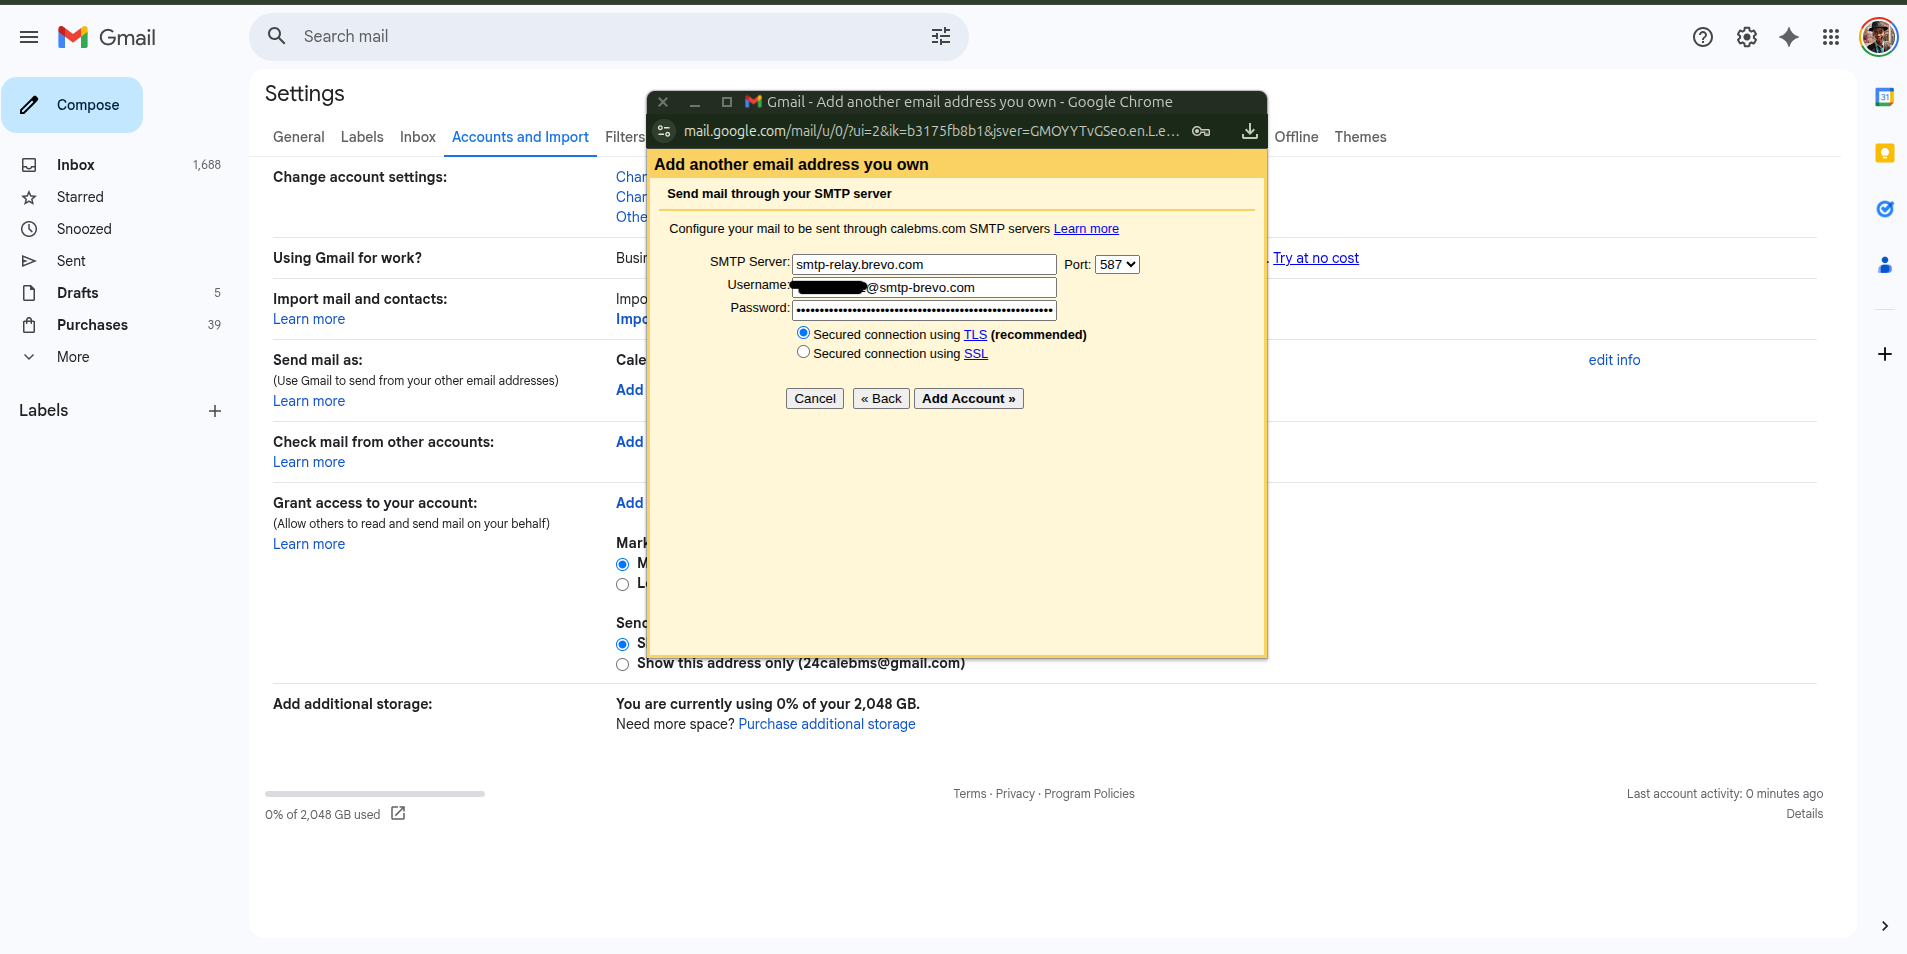
Enter the SMTP details from Brevo:
SMTP Server:
smtp-relay.brevo.comPort:
587Username: Your Brevo Login.
Password: Your generated SMTP Key.
Select Secured connection using TLS.
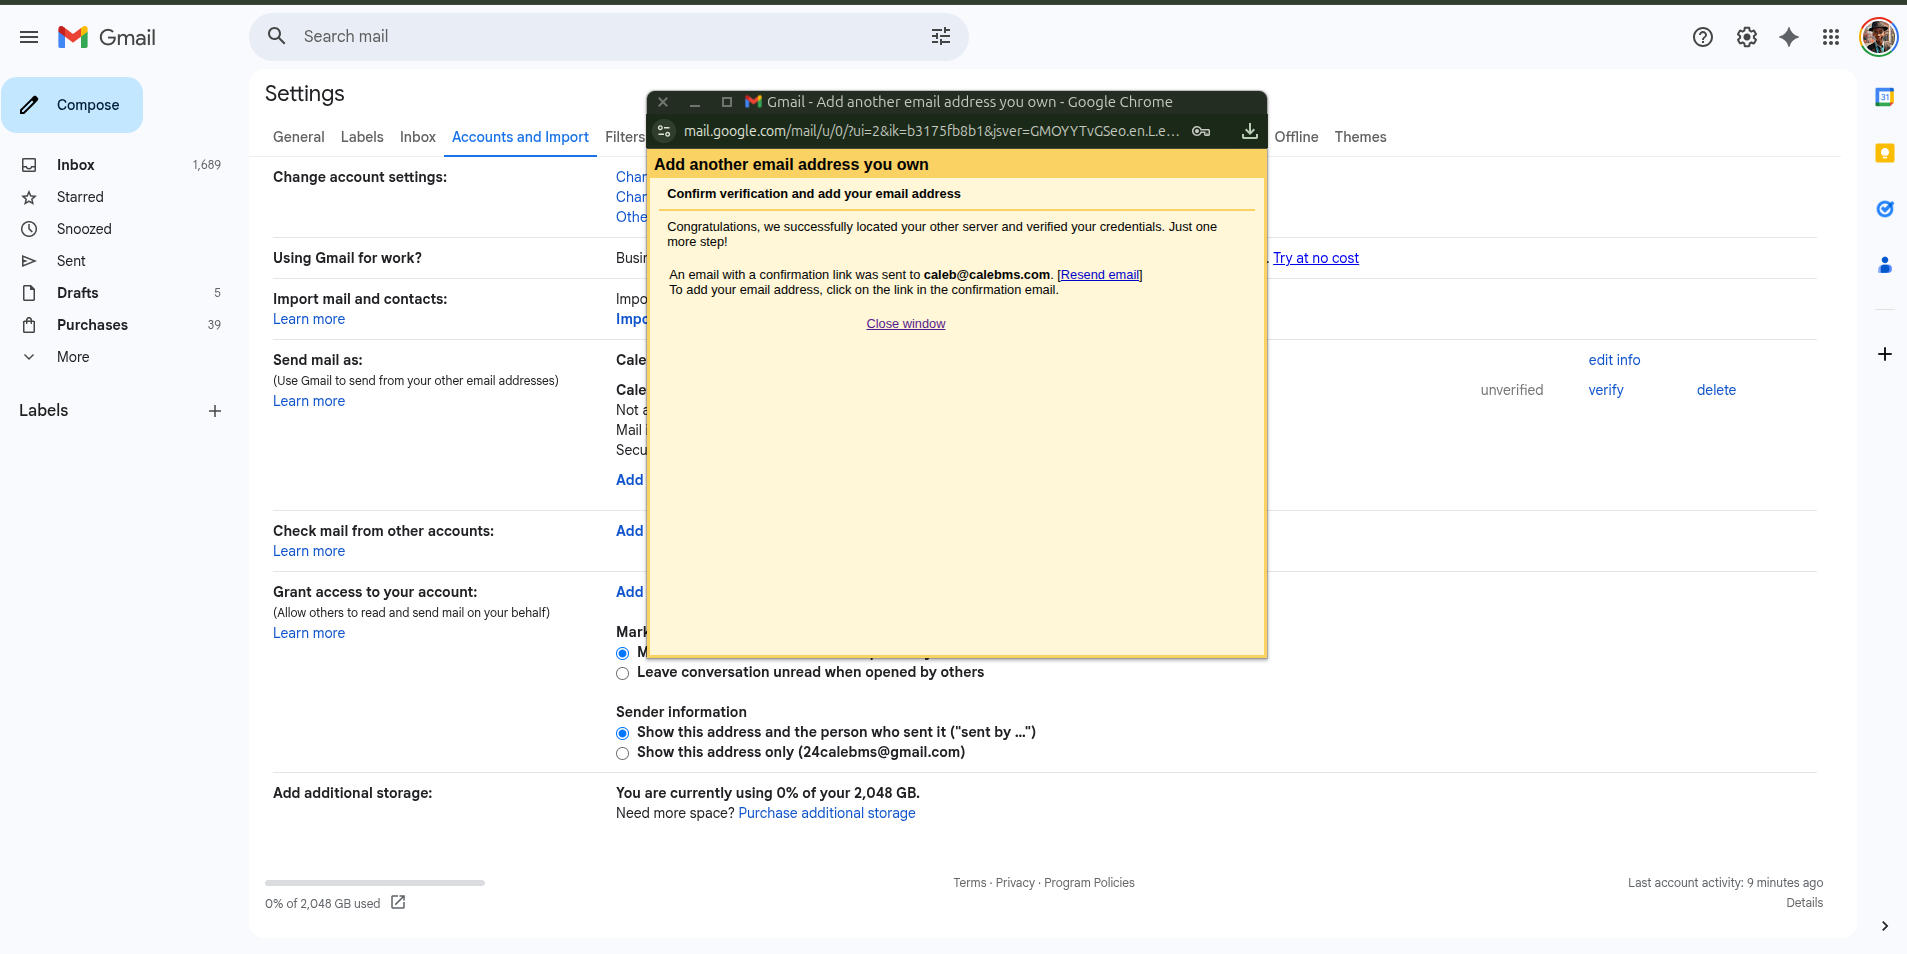
Step 5: Verify and Start Sending
Gmail will send a confirmation code to your professional email. Since you set up forwarding in Step 2, this code will arrive in your Gmail inbox.
Copy the code, paste it into the verification box, and click Verify.
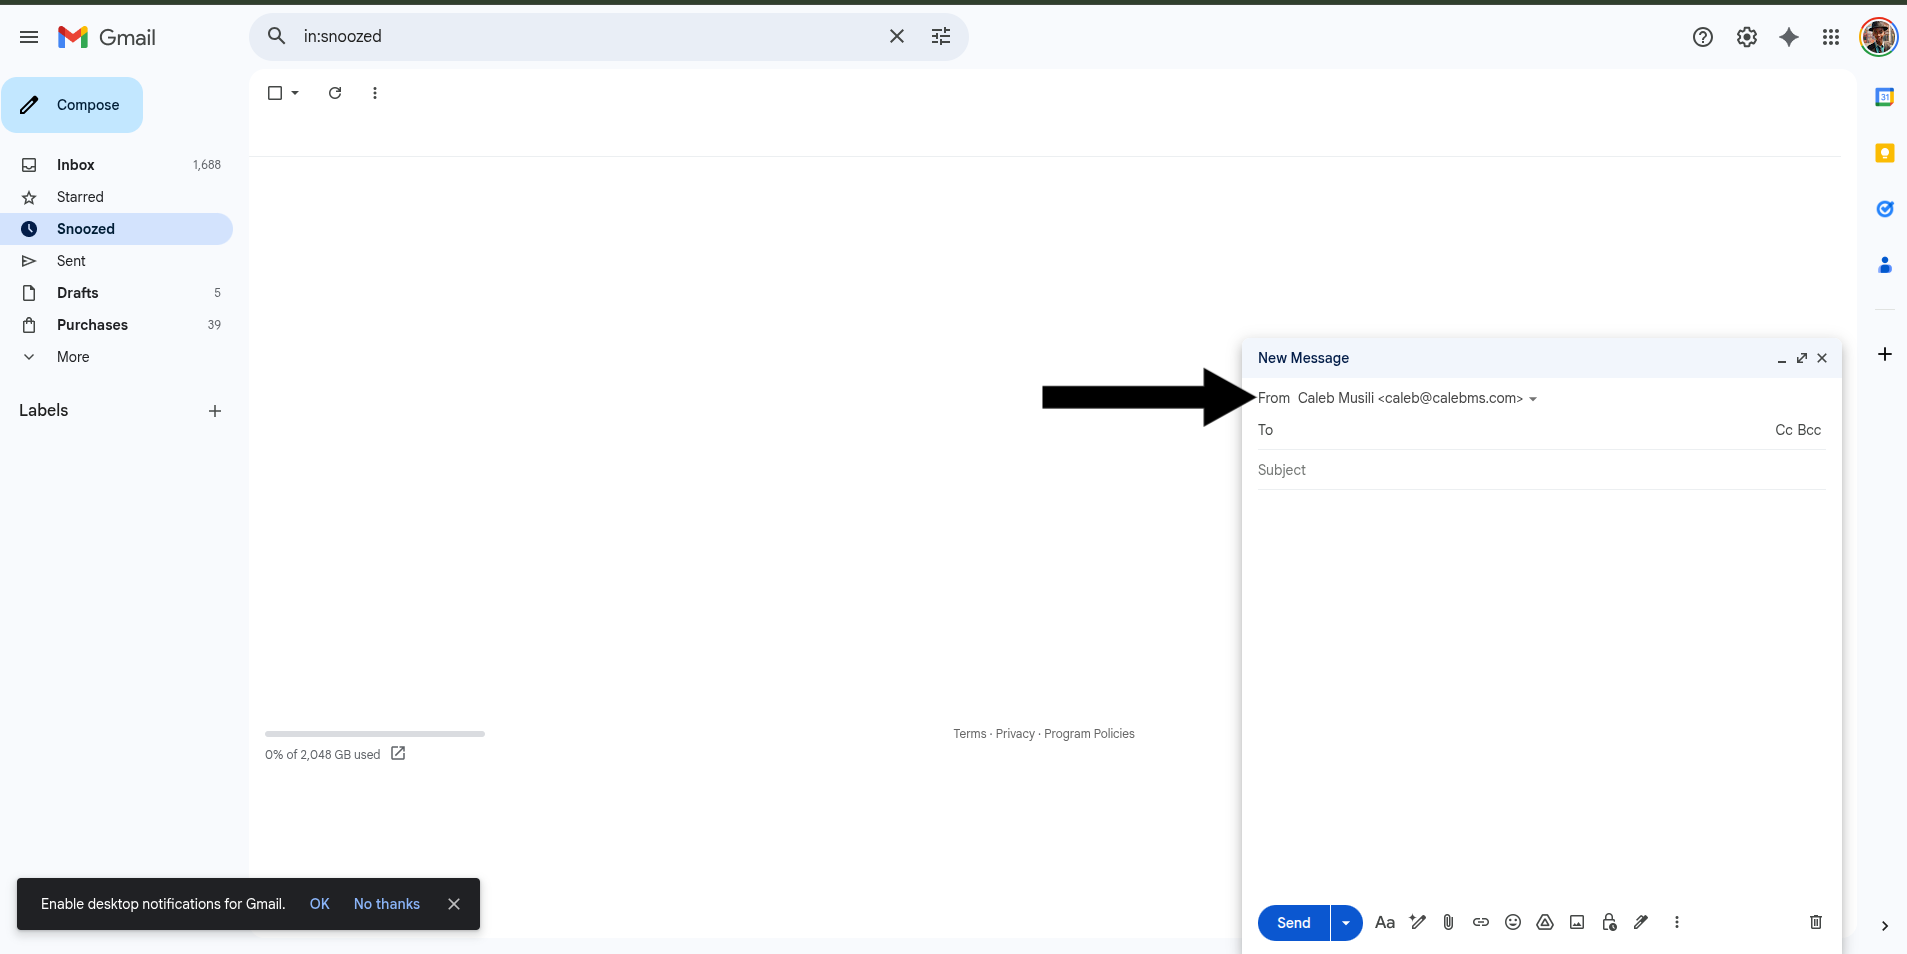
Refresh Gmail. When you click "Compose," you can now select your professional email from the "From" dropdown!
A Note on Deliverability
When testing, avoid subject lines like "Test 123." Filters often flag these as spam. Use a real subject line and body text to ensure your professional email maintains a high sender reputation.
Summary of Pros & Cons
Pros: 100% Free, unlimited receiving, professional look, no "sent via" warnings.
Cons: Technical setup, 300-email daily sending limit (on Brevo Free).
Comments